Table of contents
Creating and scheduling posts are the core features on Robopost. We provide few options to create posts, and we'll explain the basic option in this documentation.
Select method
To get started, go to the POSTS > New post page. You will see several options for creating posts.

This guide will explain how to create posts using the Simple Post method. For other methods, please refer to the following guides:
Schedule
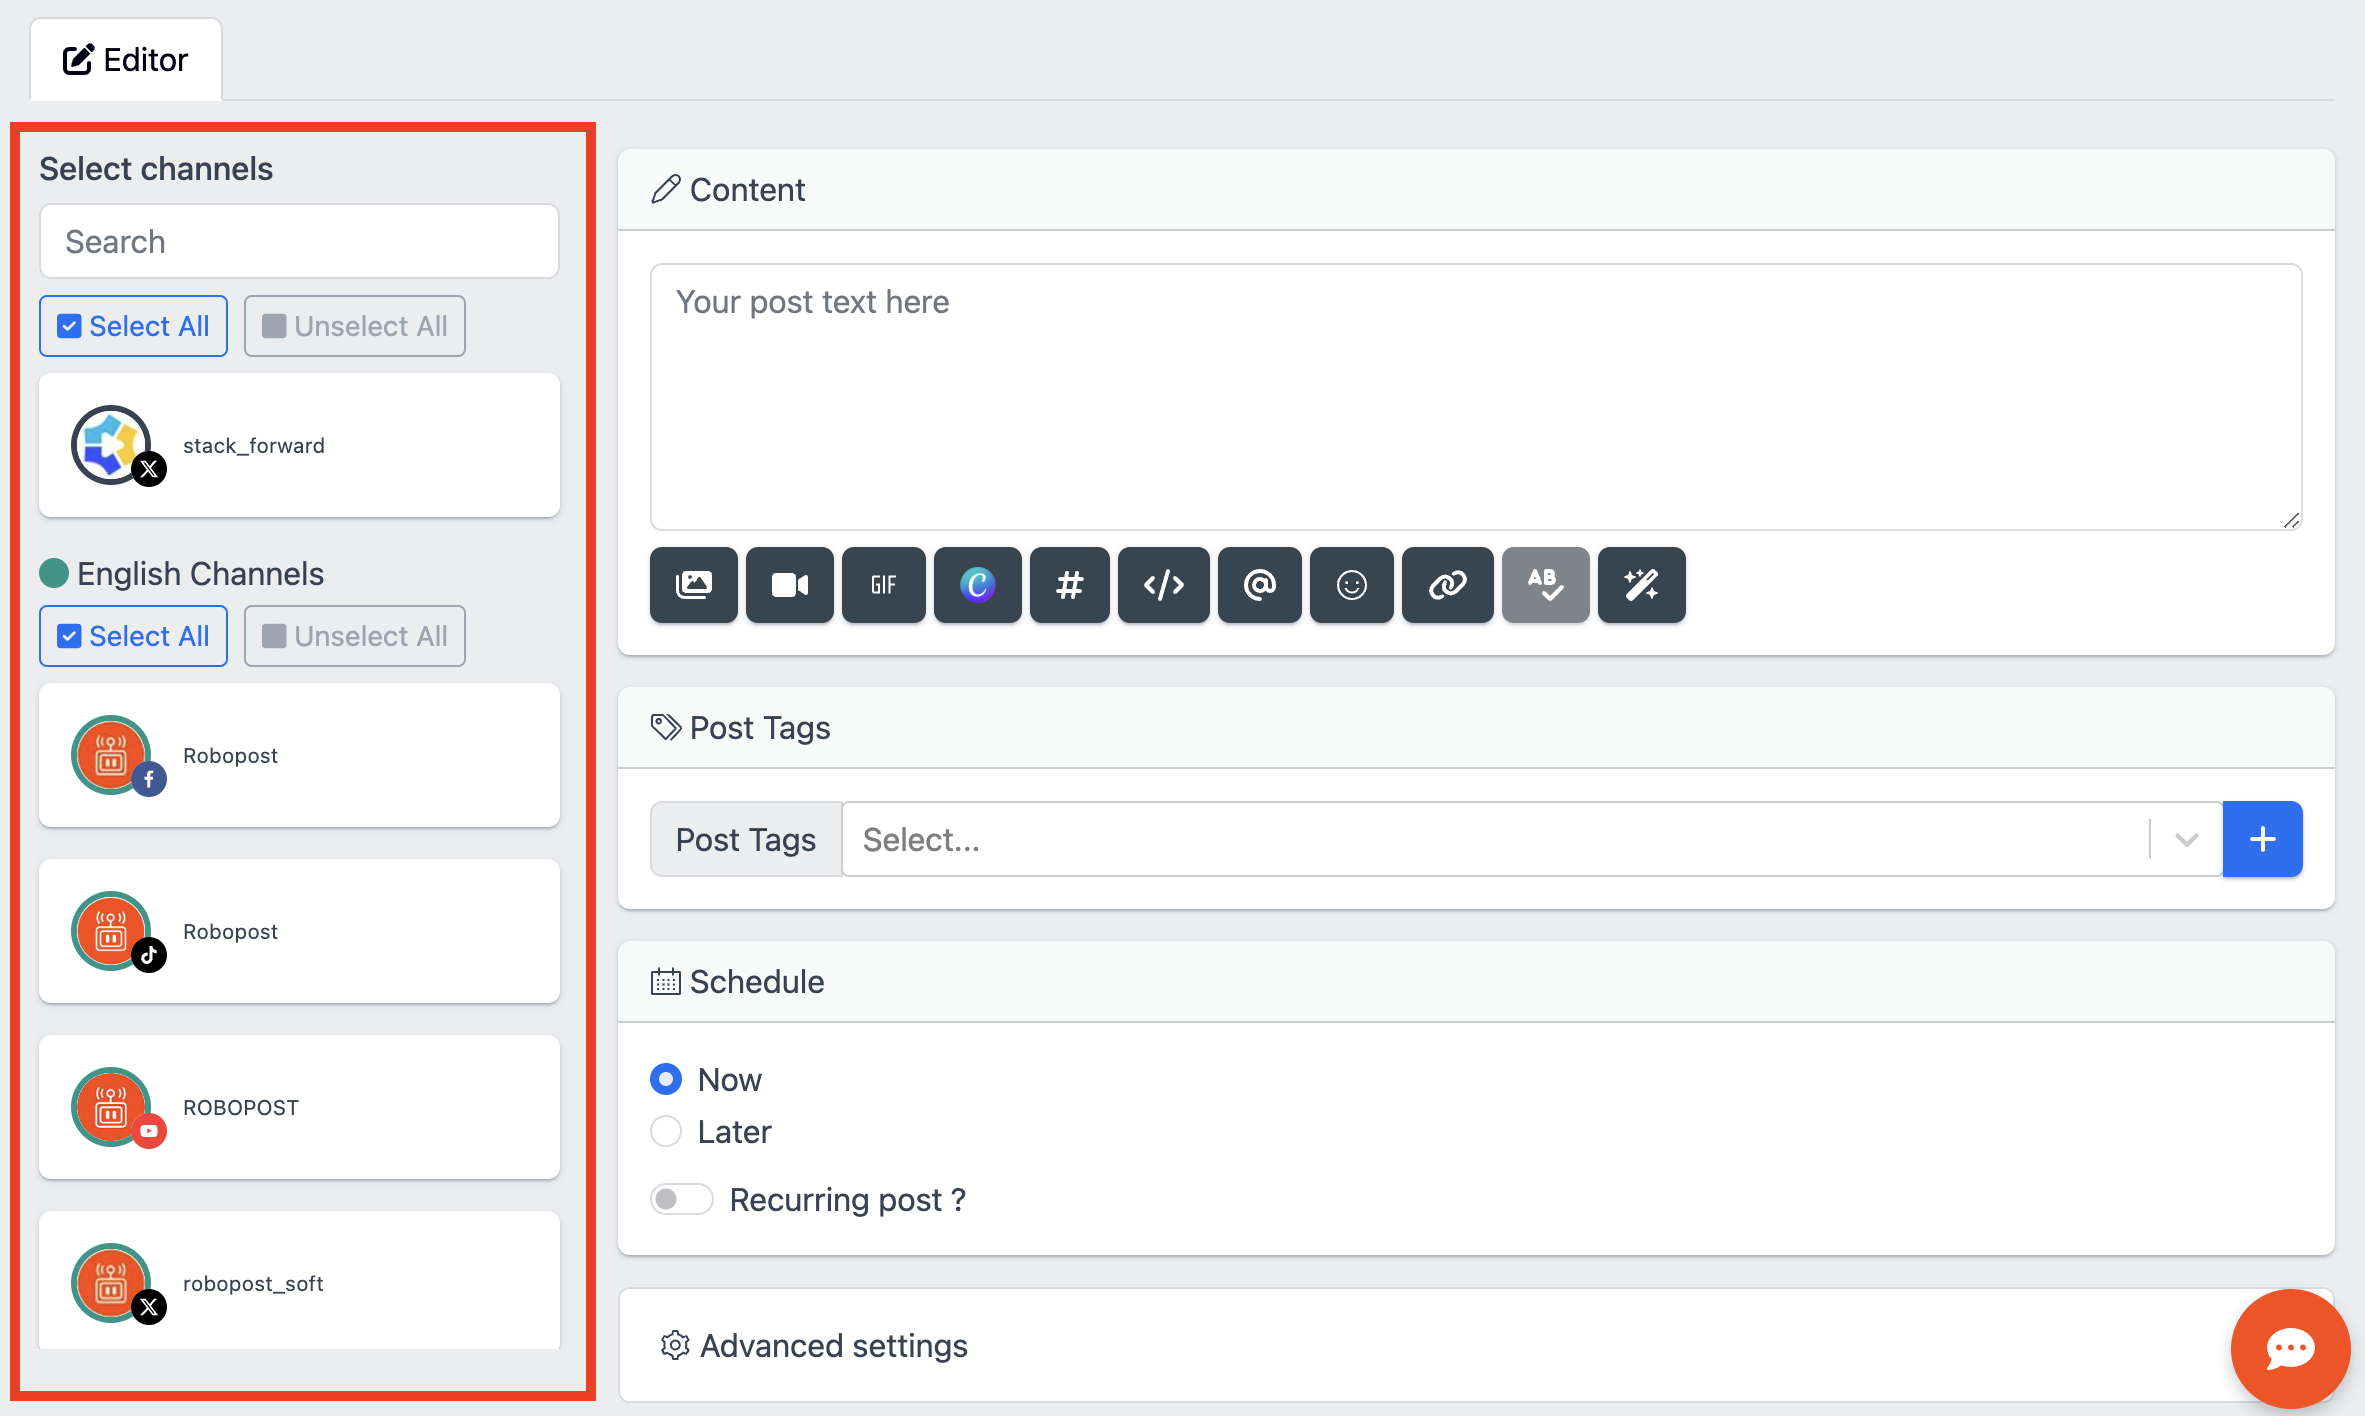
Select channels
You can see lists of channels that you have connected on the page. Select channels that you want to post the content.
Note: You can select multiple channels at the same time, but you cannot select WordPress channel with other type of channels.
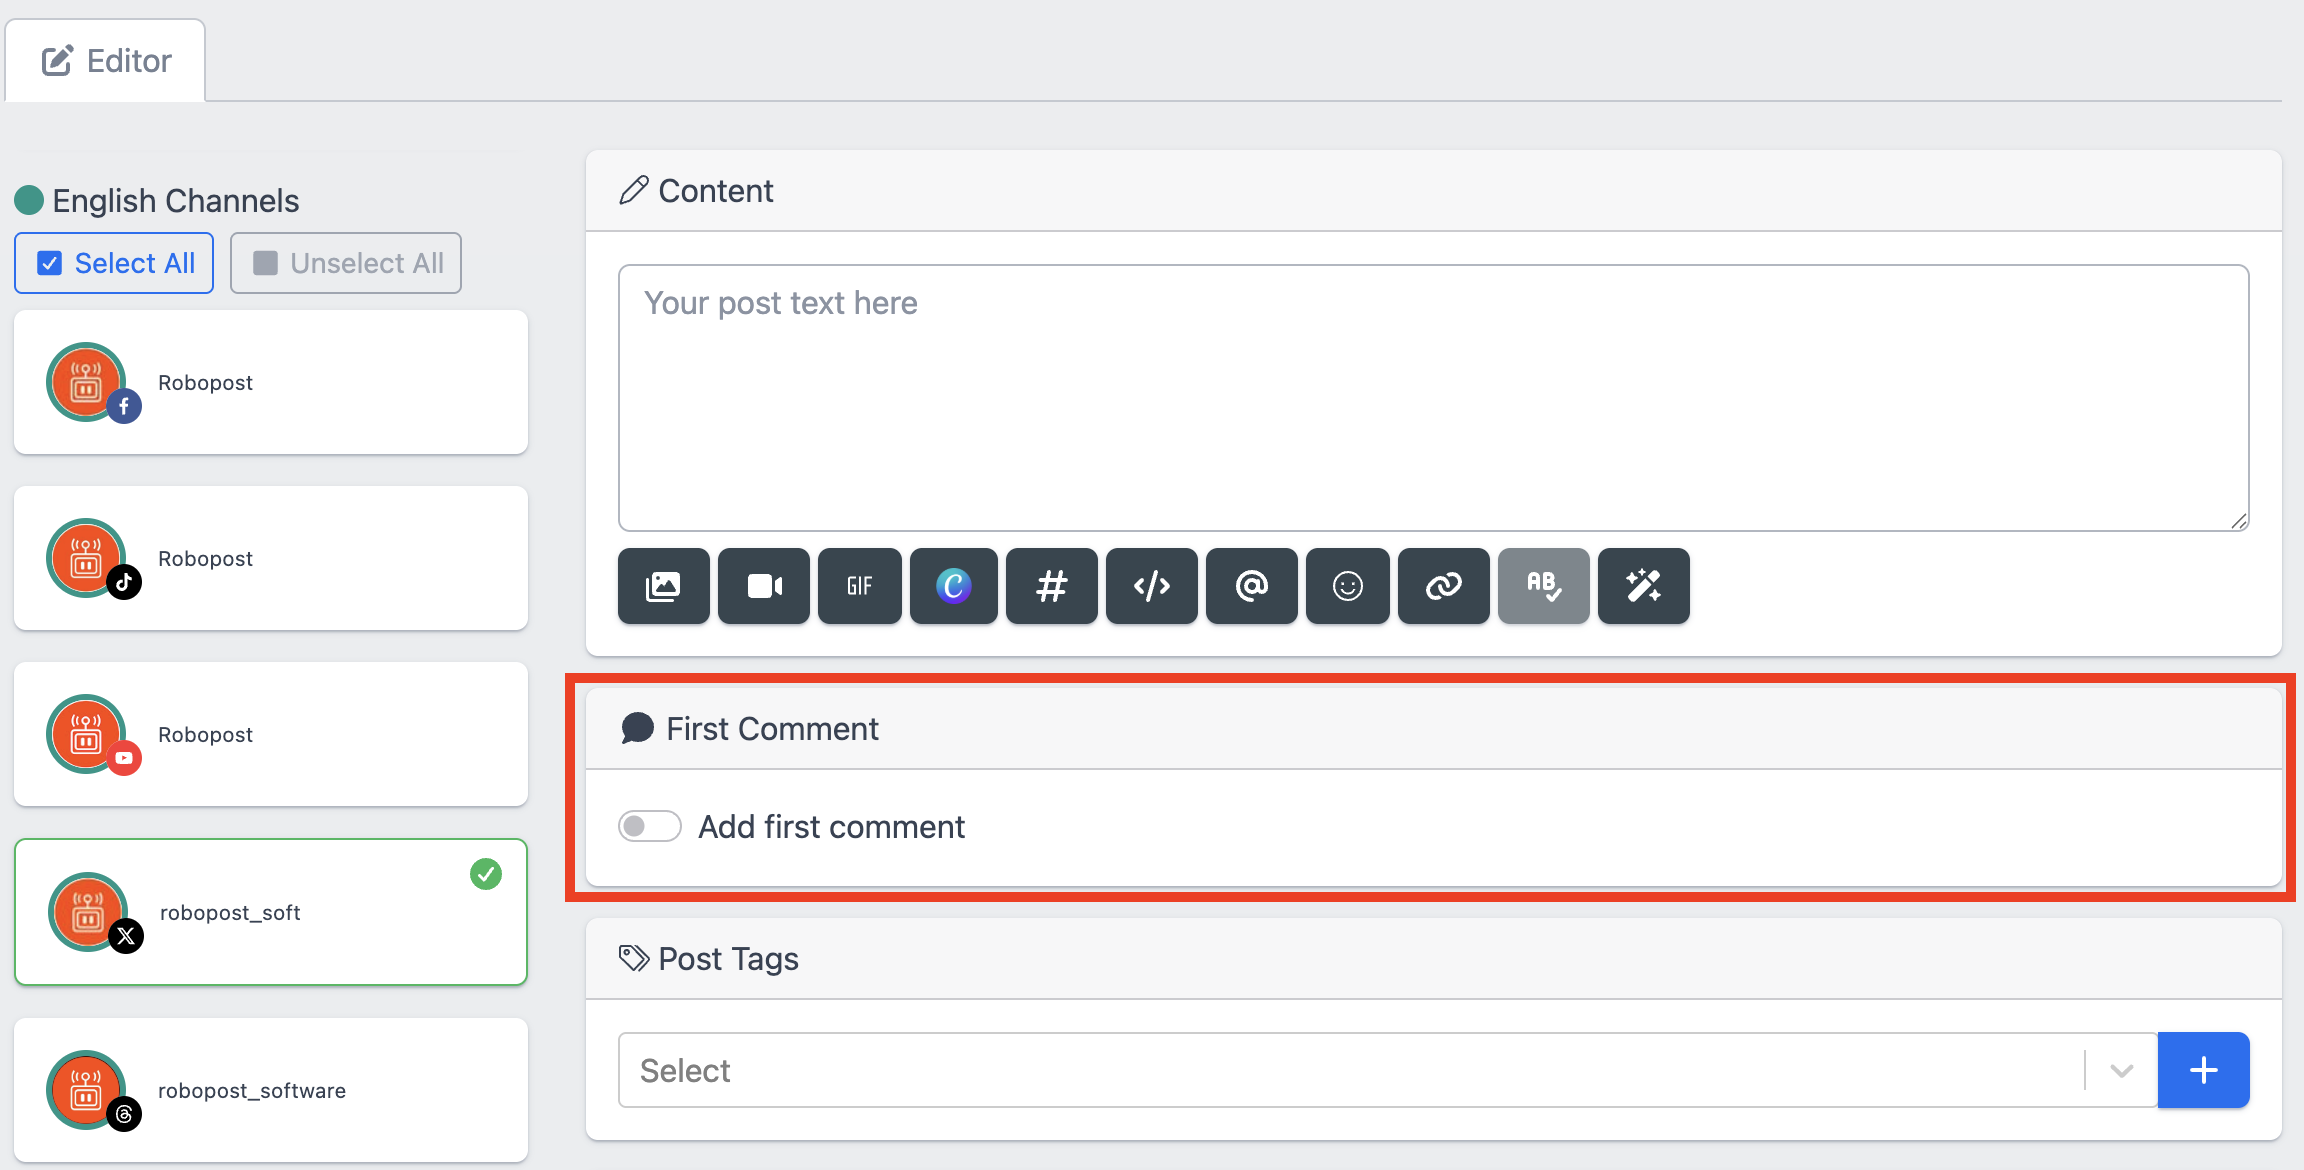
First comment
When you select a channel, the First Comment settings will appear. This is useful for sharing links or other content you don’t want to include in the main post, by adding them as a thread.
Set contents
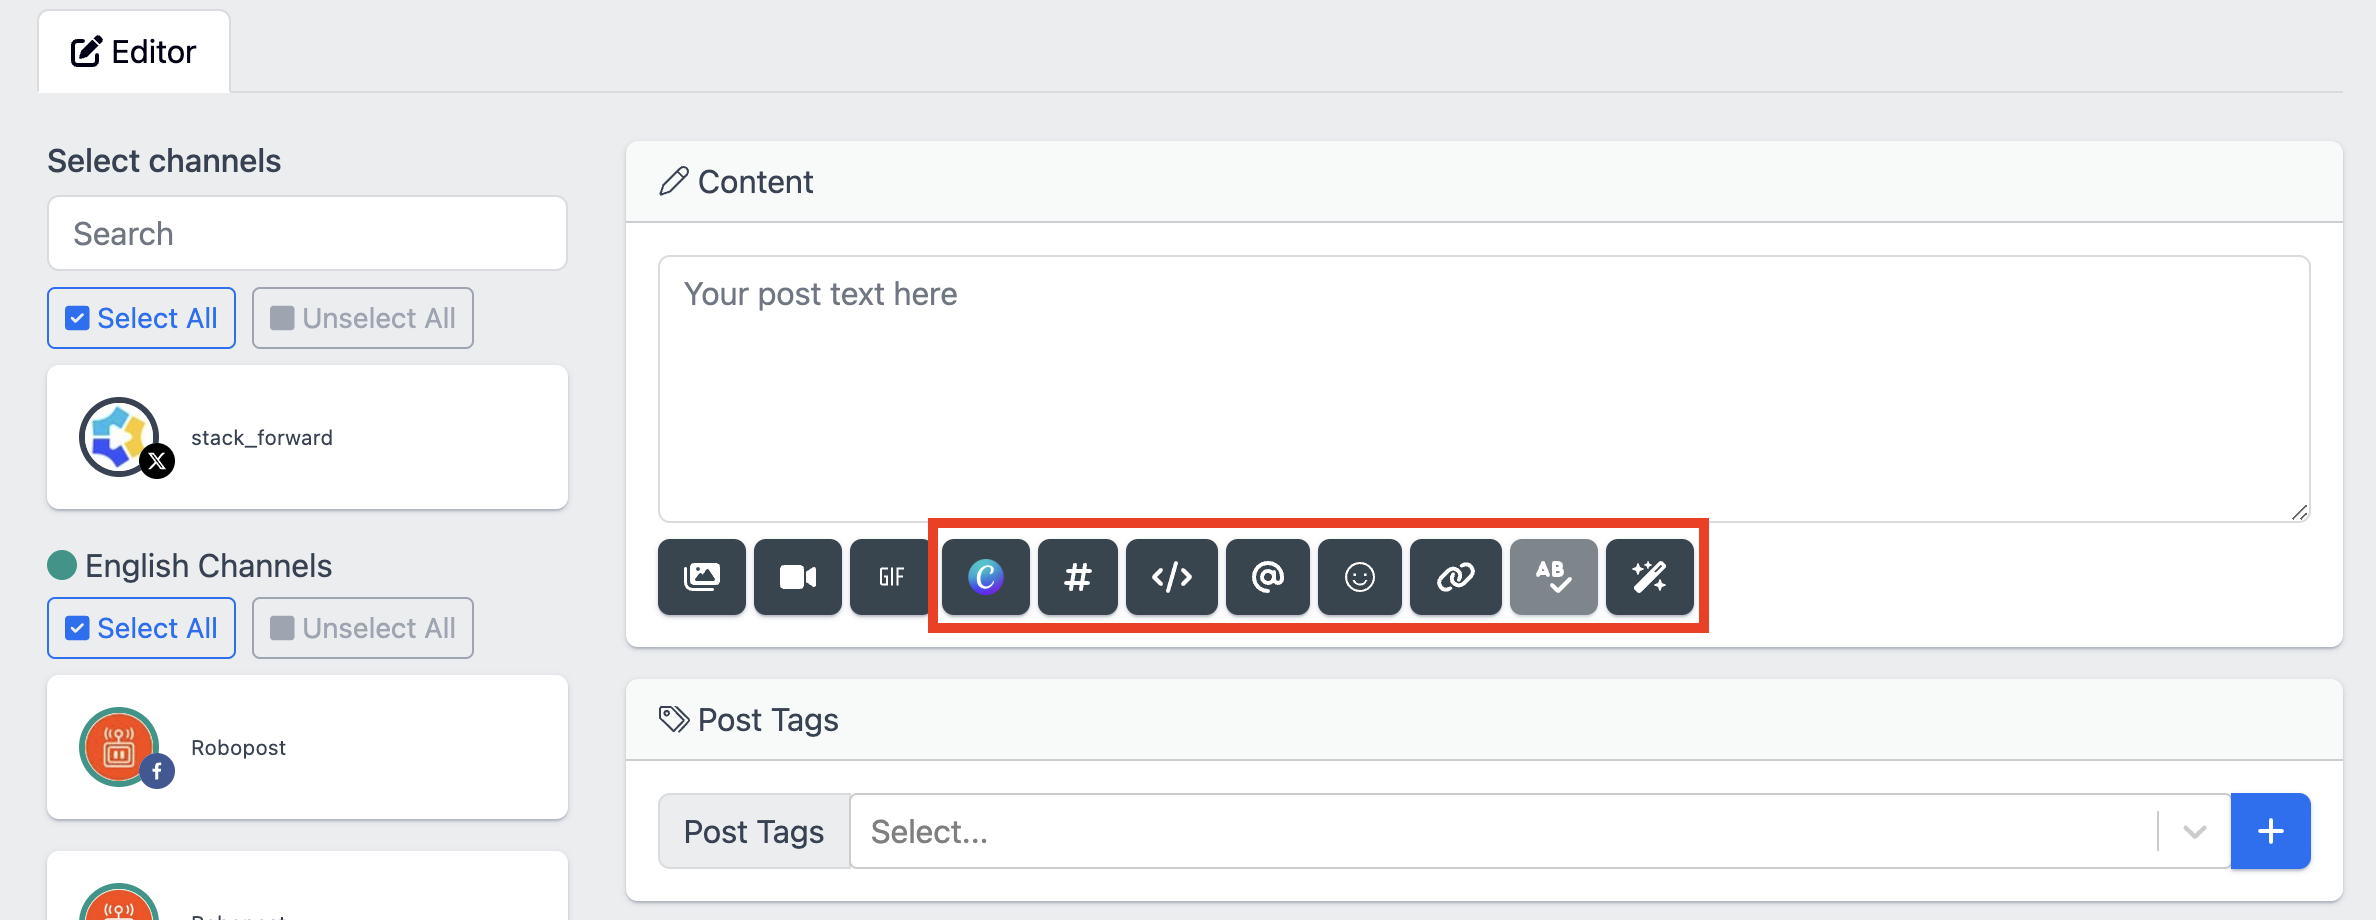
Robopost provides you some productivity tools that help you writing sentences to attract your potential customers. Let's write some text in Content block.
- Short Code
To include template sentences in your content, use the Short Code feature. Learn more about it in the Manage Short Codes guide.
- Contact
If you want to mention accounts in your post, use the contact insertion feature. Learn more about it in the Manage Contact guide.
- Emojis
If you would like to use emojis in your content and cannot, simply input the emoji or click emoji button below the input field. You can choose any emojis from the emoji box.
- URL Shortener
URL Shortener is a tool to shorten any long link into a shortner one, and it will automatically forward a user to original URL when they click it. Click the URL shortner button, paste your long URL into the input field and click Shortnen. Create a shorter link to make your post more readable.
- Spell Checker
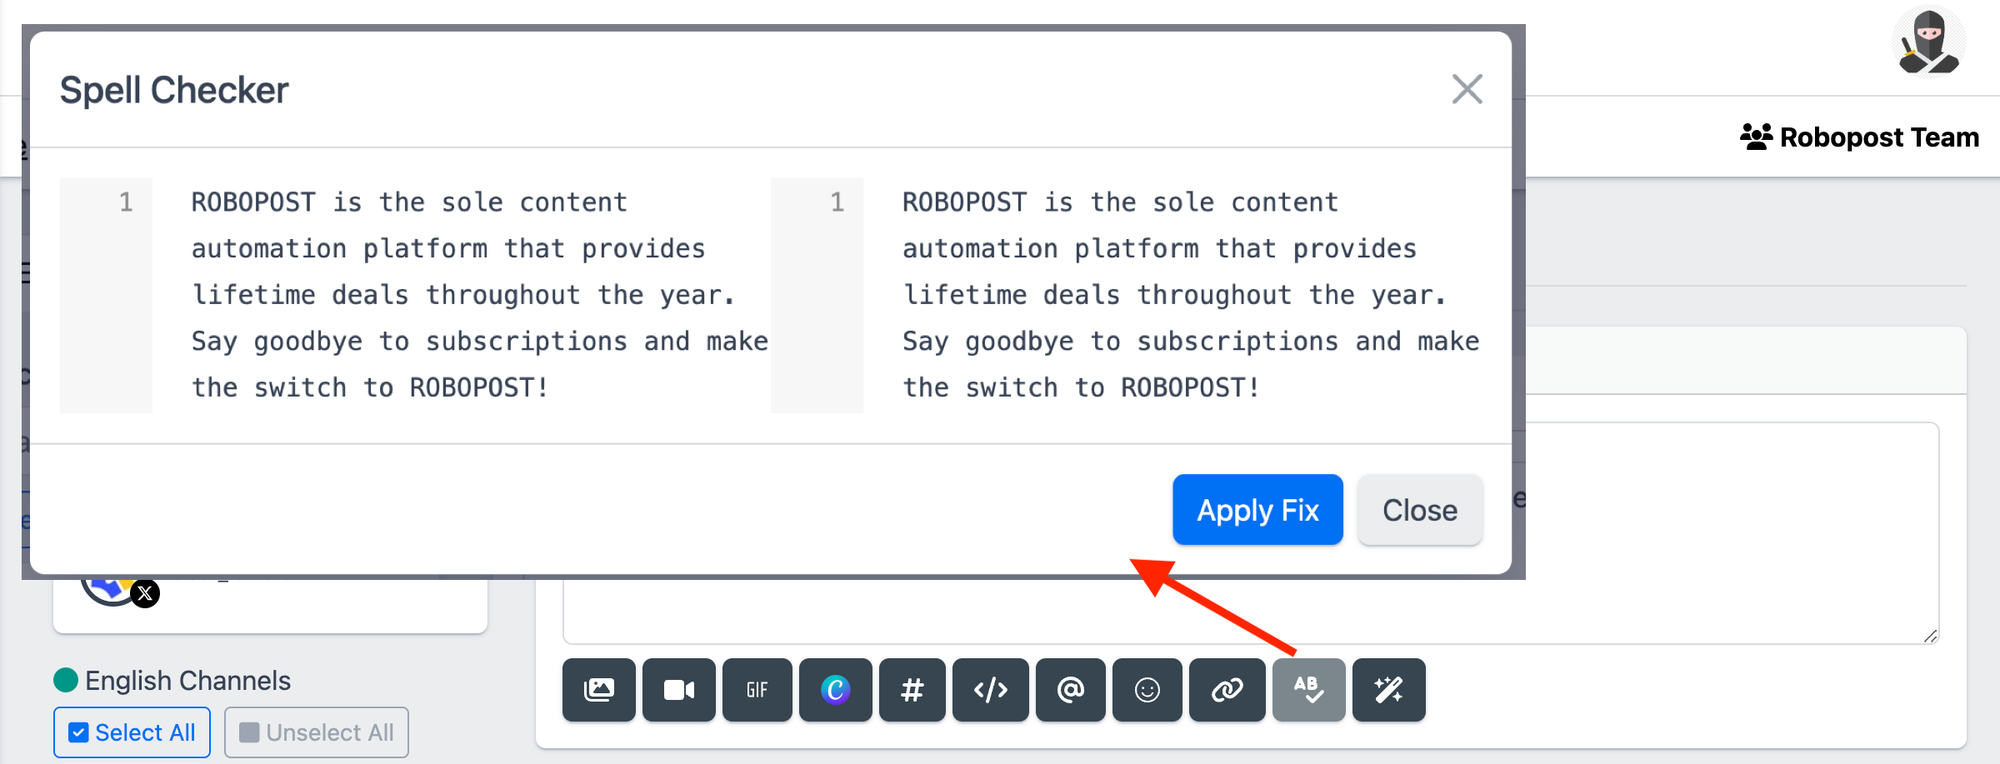
You can check if you made any spelling mistakes with Spell Checker.
- AI Text compose assistant
If you need some help to write text, AI Text compose assistant is here for you. Click T button with robot icon and type some hint in the input area. Our AI assistant will give you some idea for promoting your business.
Images and Video
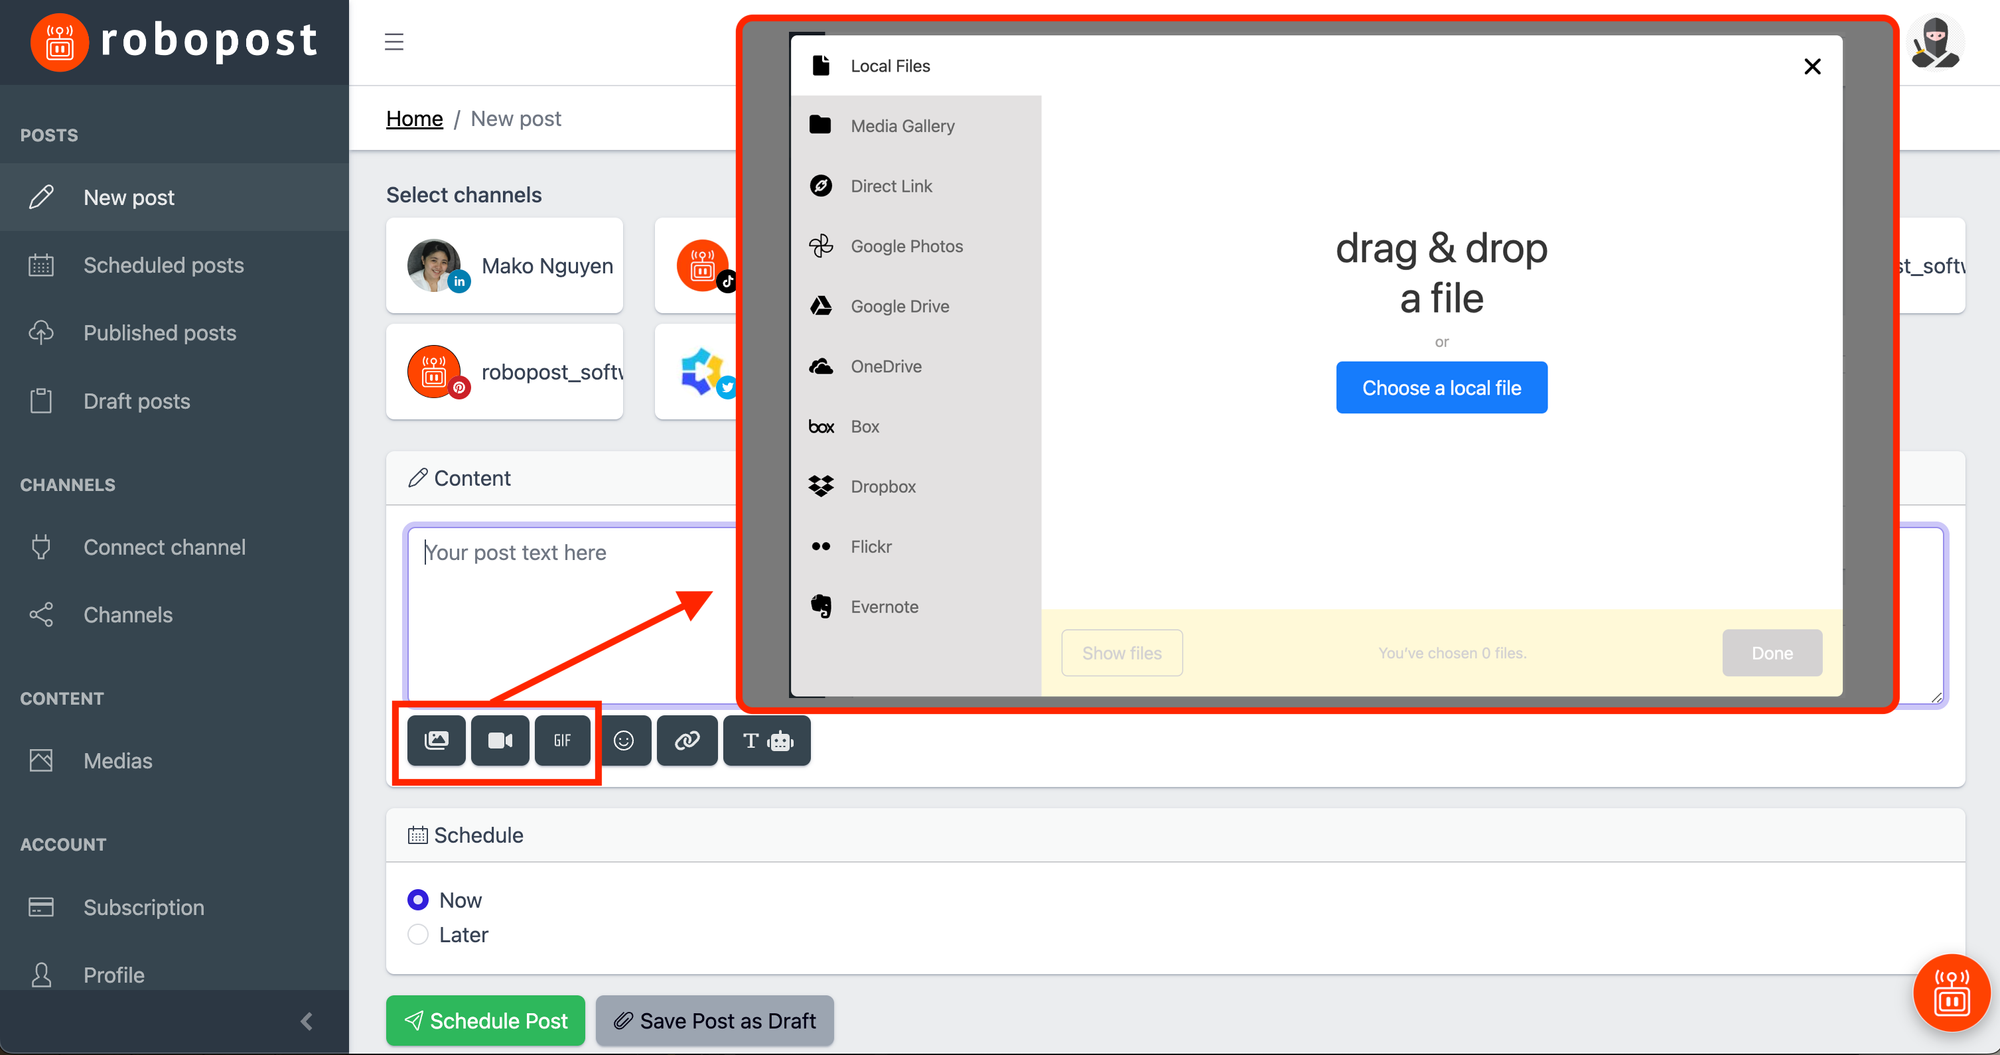
The power of visual media is enormous when it comes to Social Media Marketing. Robopost allows you to select one video, one GIF and multiple images from various places/services such as:
- Local Files (from your PC)
- Media Gallery (Only for images)
- Direct Link
- Google Photos
- Google Drive
- OneDrive
- Box
- Dropbox
- Flickr
- Evernote
Crop Images
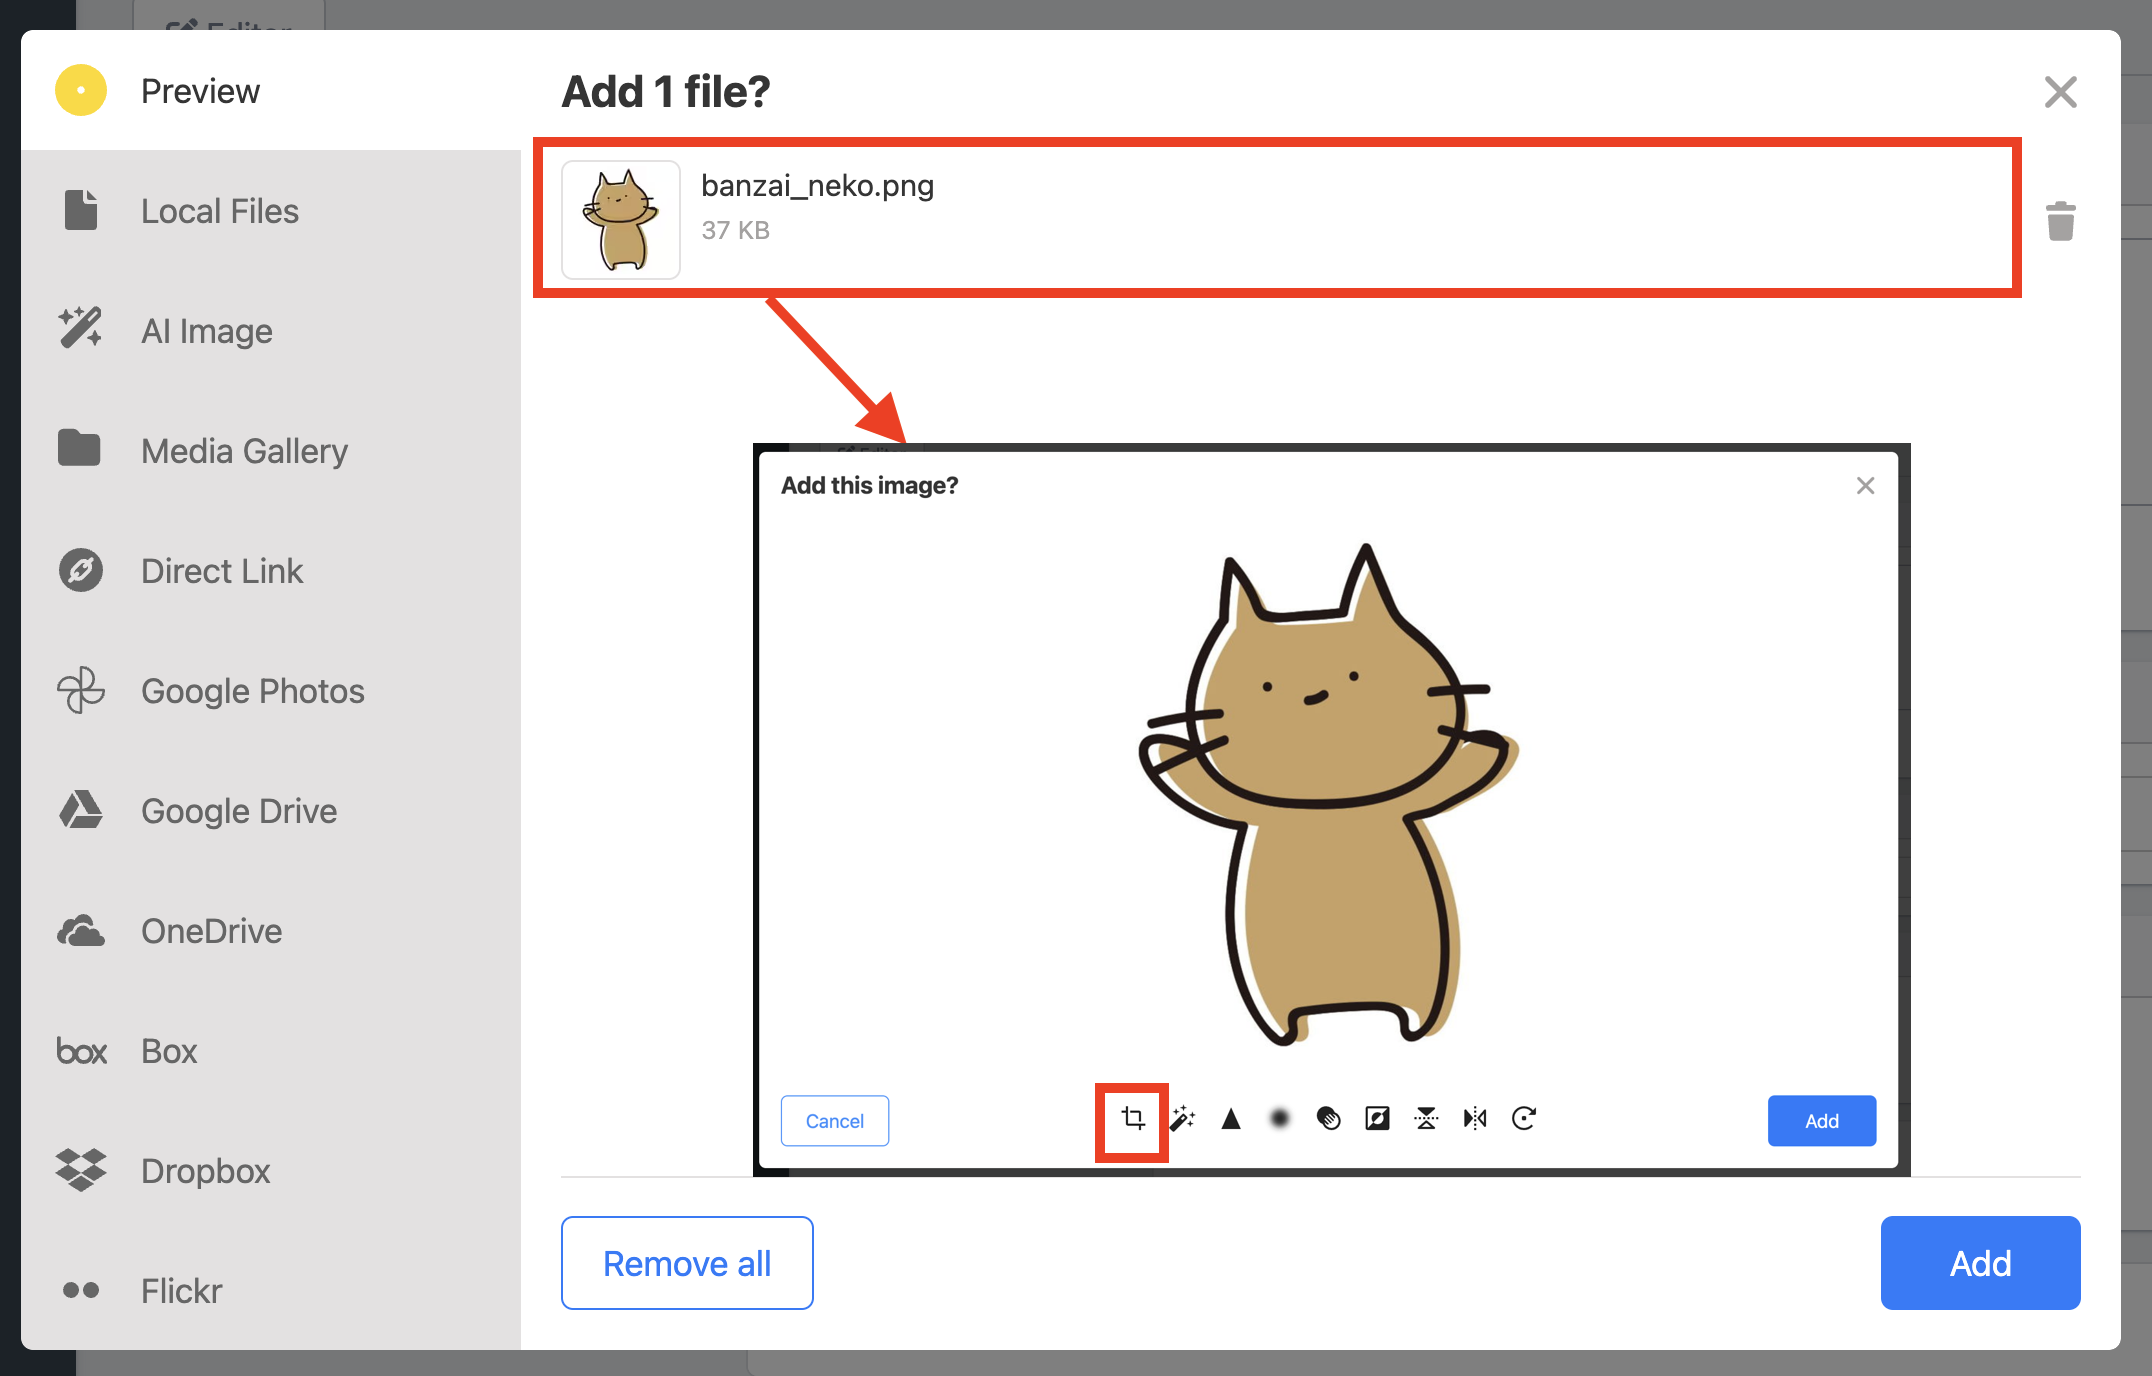
Select the image you want to crop and tap the crop icon.
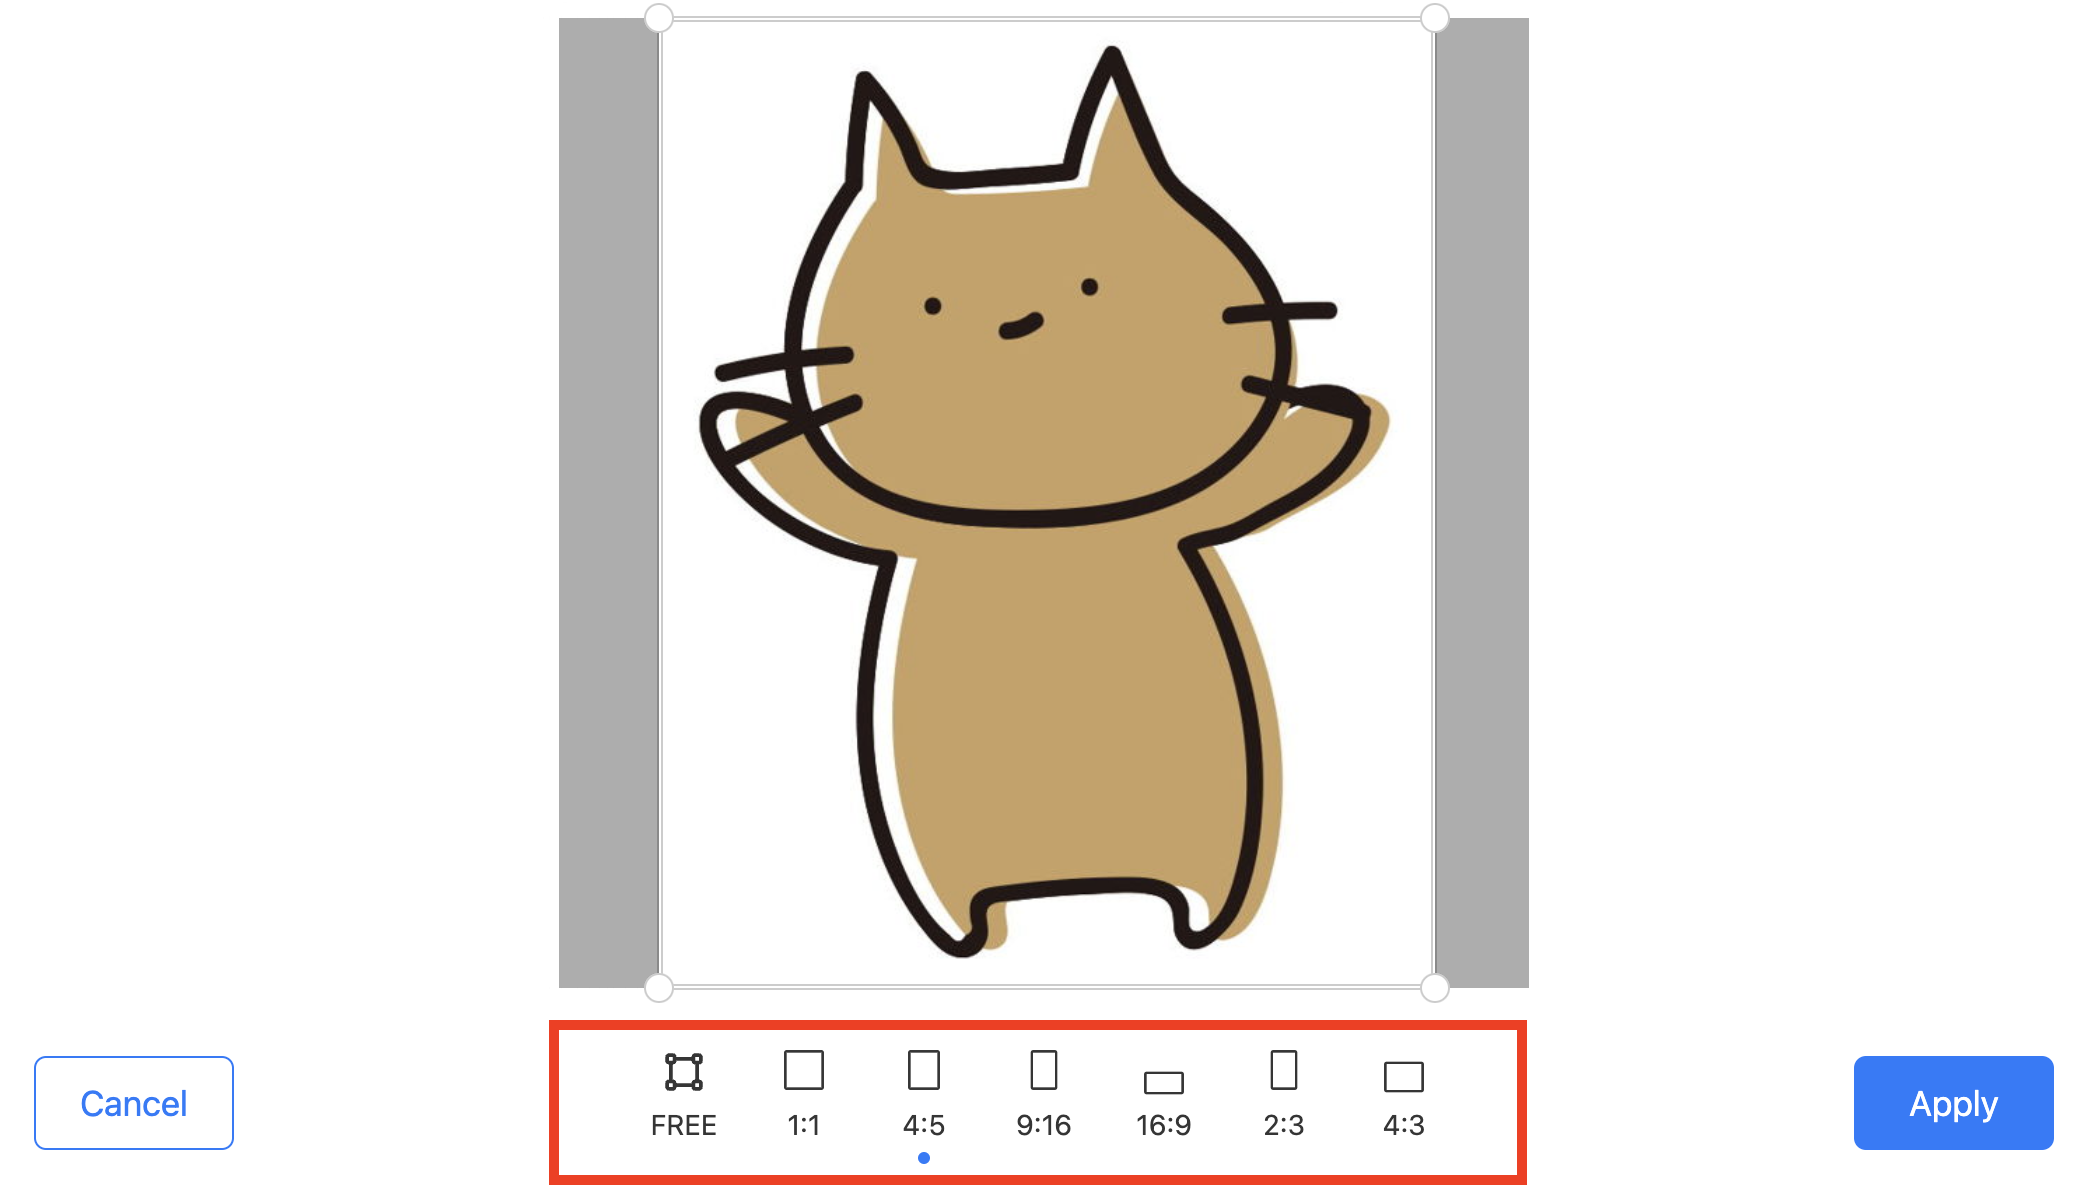
After selecting your preferred aspect ratio, position the frame over the area you want to crop and click the button.
Tag account
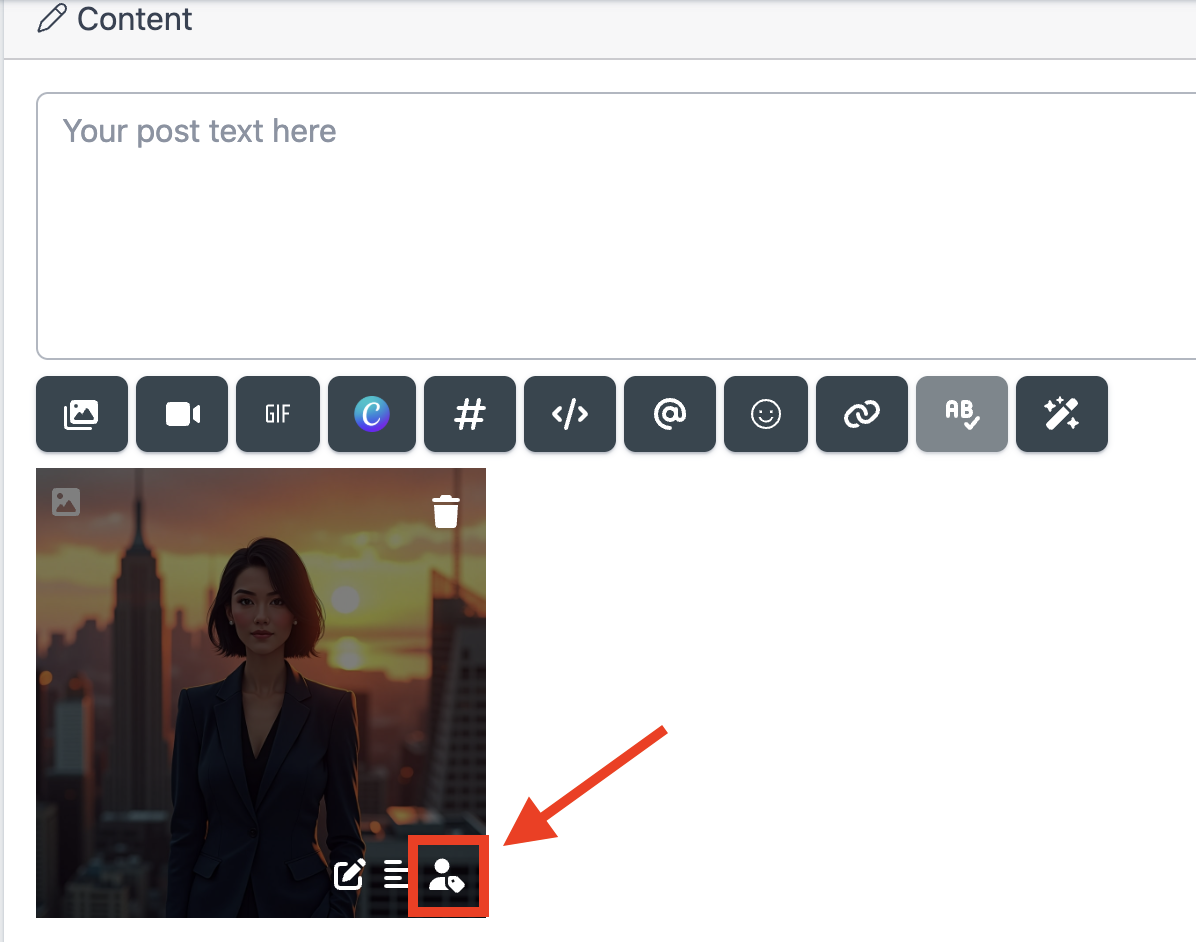
Click the tag icon at the bottom right of the uploaded image to tag accounts in the image. This feature is currently available only on Instagram.
Schedule Post
Robopost provides you 2 types of scheduling, Post now and Post later.
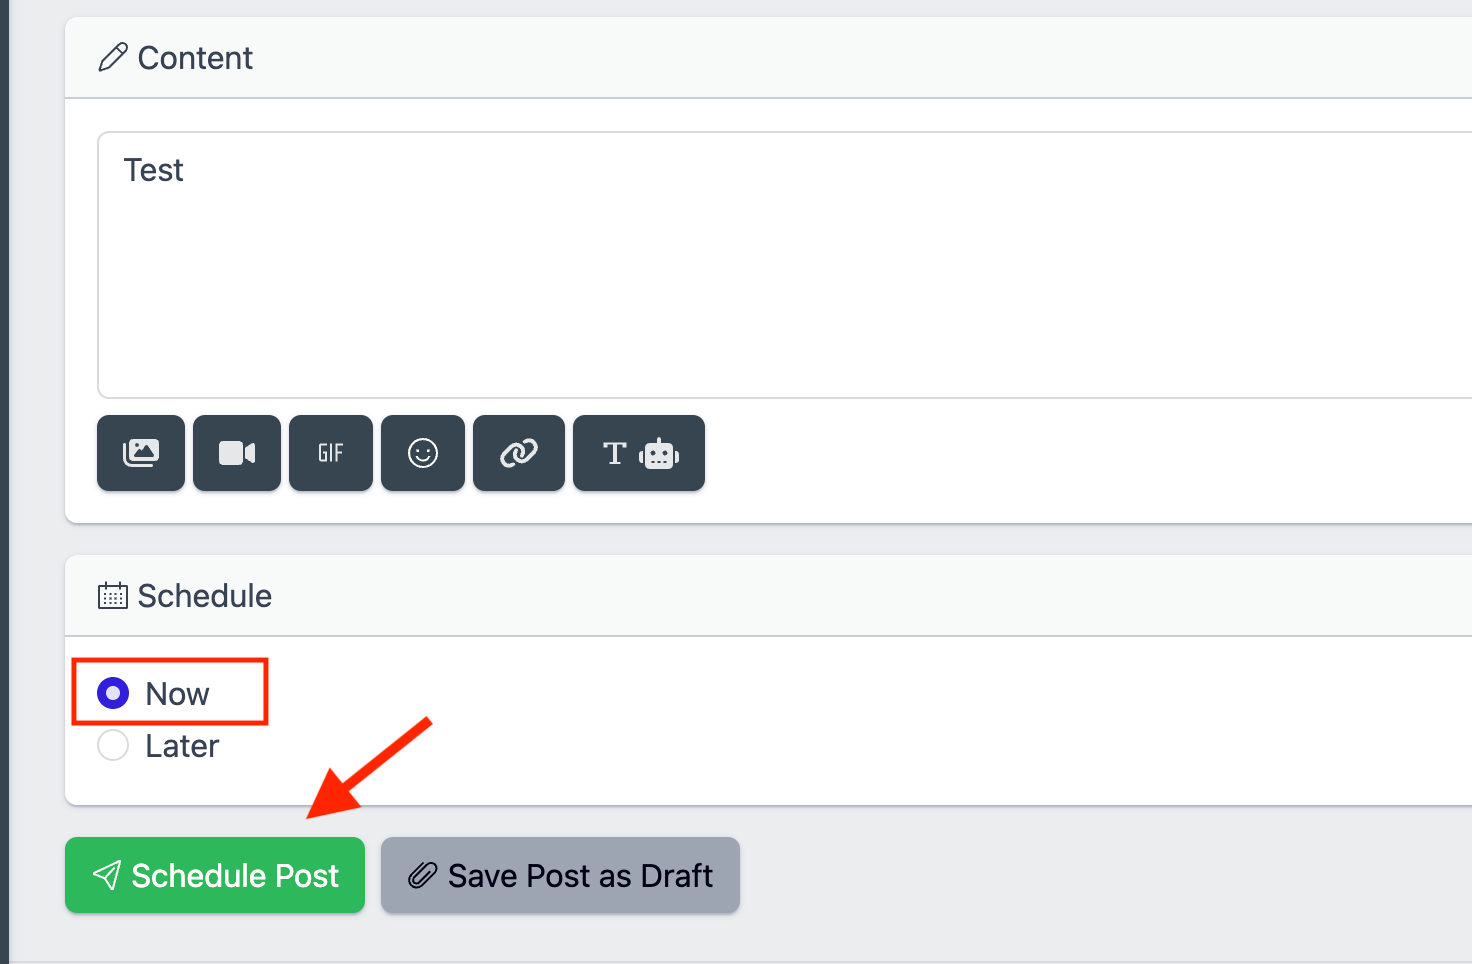
If you want to publish your post right now, select Now and click Schedule Post. You can check if the post has been successfully published to channels you selected at POSTS > Scheduled posts.
This is one of the most important features that Robopost provides: the ability to schedule posts for the future. Click on Later, select a date and time from the calendar, and then click Schedule Post.
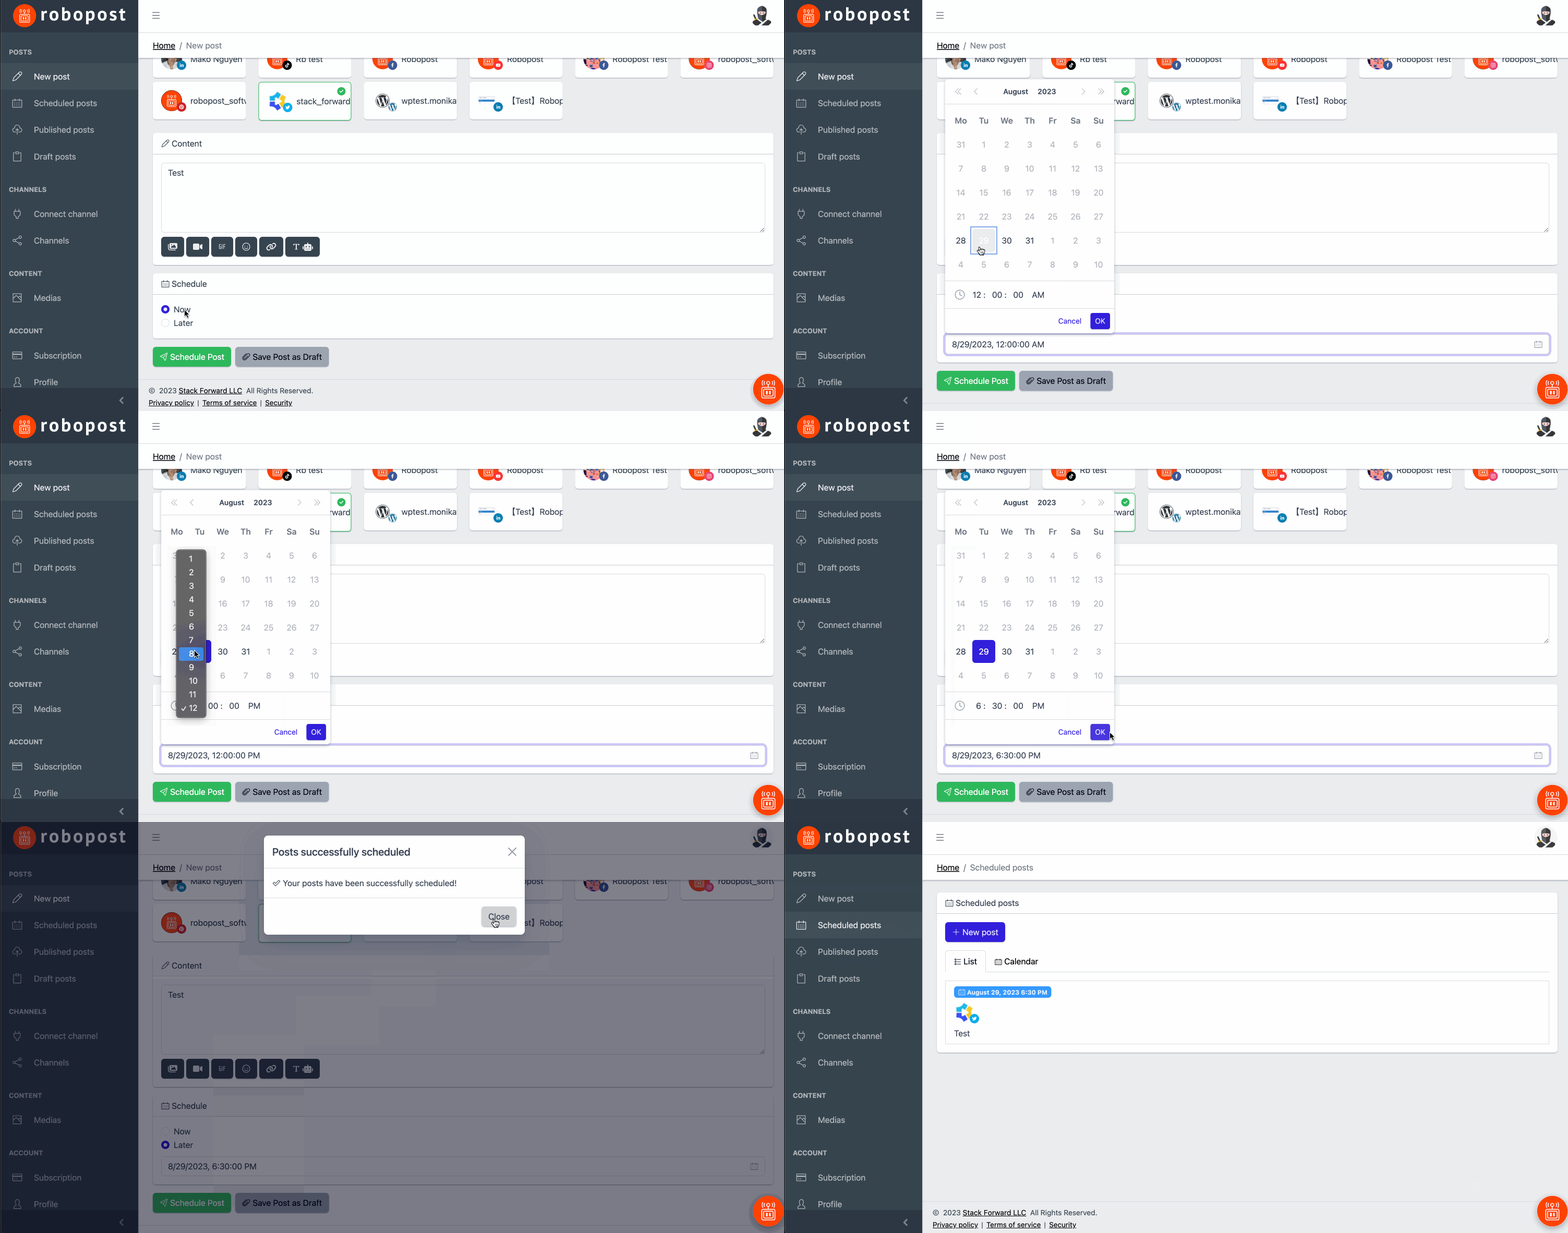
Scheduling Options
Recurring post
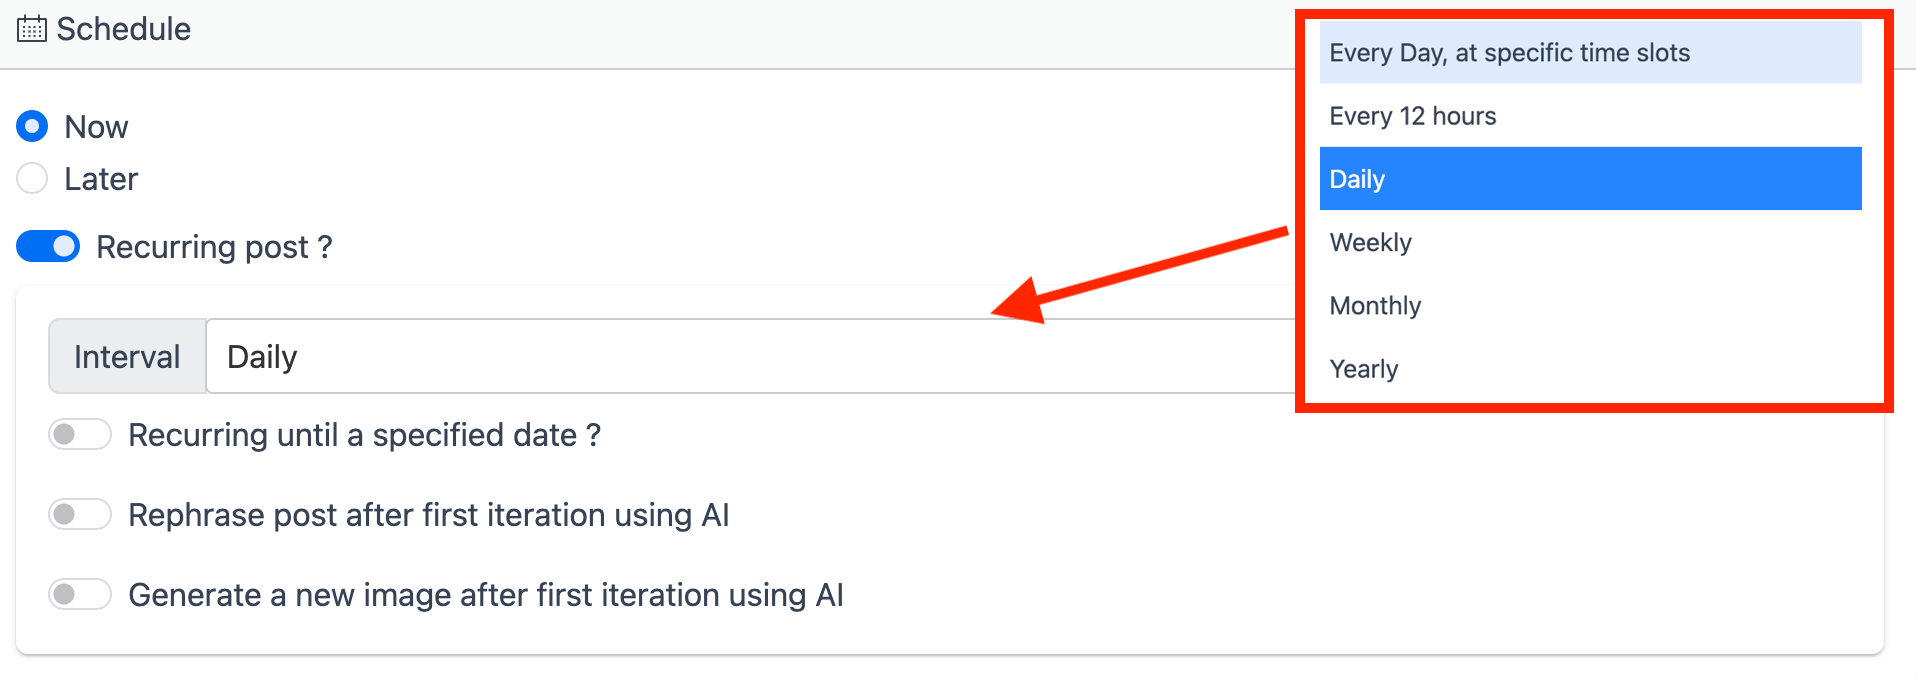
By turning on Recurring post? switch, you can enable the Recurring Post feature to schedule posts to repeat. There are five interval options available: Every Day, at specific time slots, Every 12 hours, Daily, Weekly, Monthly, or Yearly.
Explanation:
The Recurring Post feature allows you to schedule posts that will automatically repeat at specified intervals. Here’s an explanation of each recurring option:
1. Every Day, at Specific Time Slots
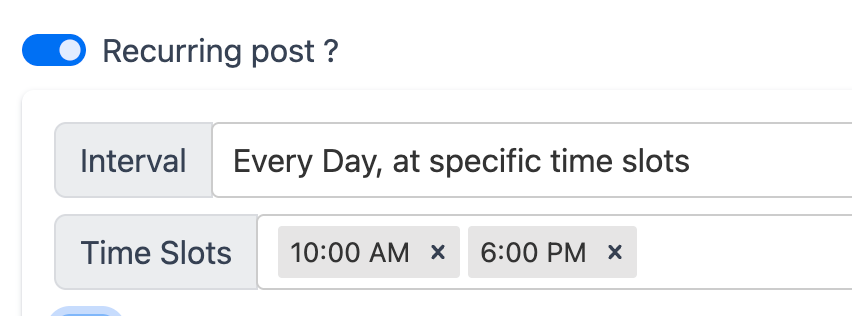
- Posts will be scheduled to recur every single day at specific times that you define. Unlike "Daily" option, There could be multiple slots a day.
- Example: If you set a post for 10:00 AM and 6:00 PM daily, the system will publish the post at those times every day.
2. Every 12 Hours
- Posts will recur at 12-hour intervals, ensuring two posts every day spaced evenly apart.
- Example: If the first post goes live at 8:00 AM, the next one will be published at 8:00 PM, and this pattern will continue daily.
3. Daily
- Posts will repeat once every day at a specific time.
- Example: A post set for 9:00 AM will be published at 9:00 AM every day.
4. Weekly
- Posts will recur once a week on the same day and time as the original post.
- Example: A post scheduled for 3:00 PM on Monday will be published every Monday at 3:00 PM.
5. Monthly
- Posts will repeat on the same date each month at the designated time.
- Example: A post set for 10:00 AM on the 15th of March will also post at 10:00 AM on the 15th of April, May, and so on.
6. Yearly
- Posts will recur on the same date and time every year.
- Example: A post scheduled for 1:00 PM on December 25 will repeat at the same time every December 25 in subsequent years.
These options allow for flexibility in automating posts according to your scheduling needs, making it easier to manage recurring events, announcements, or reminders.
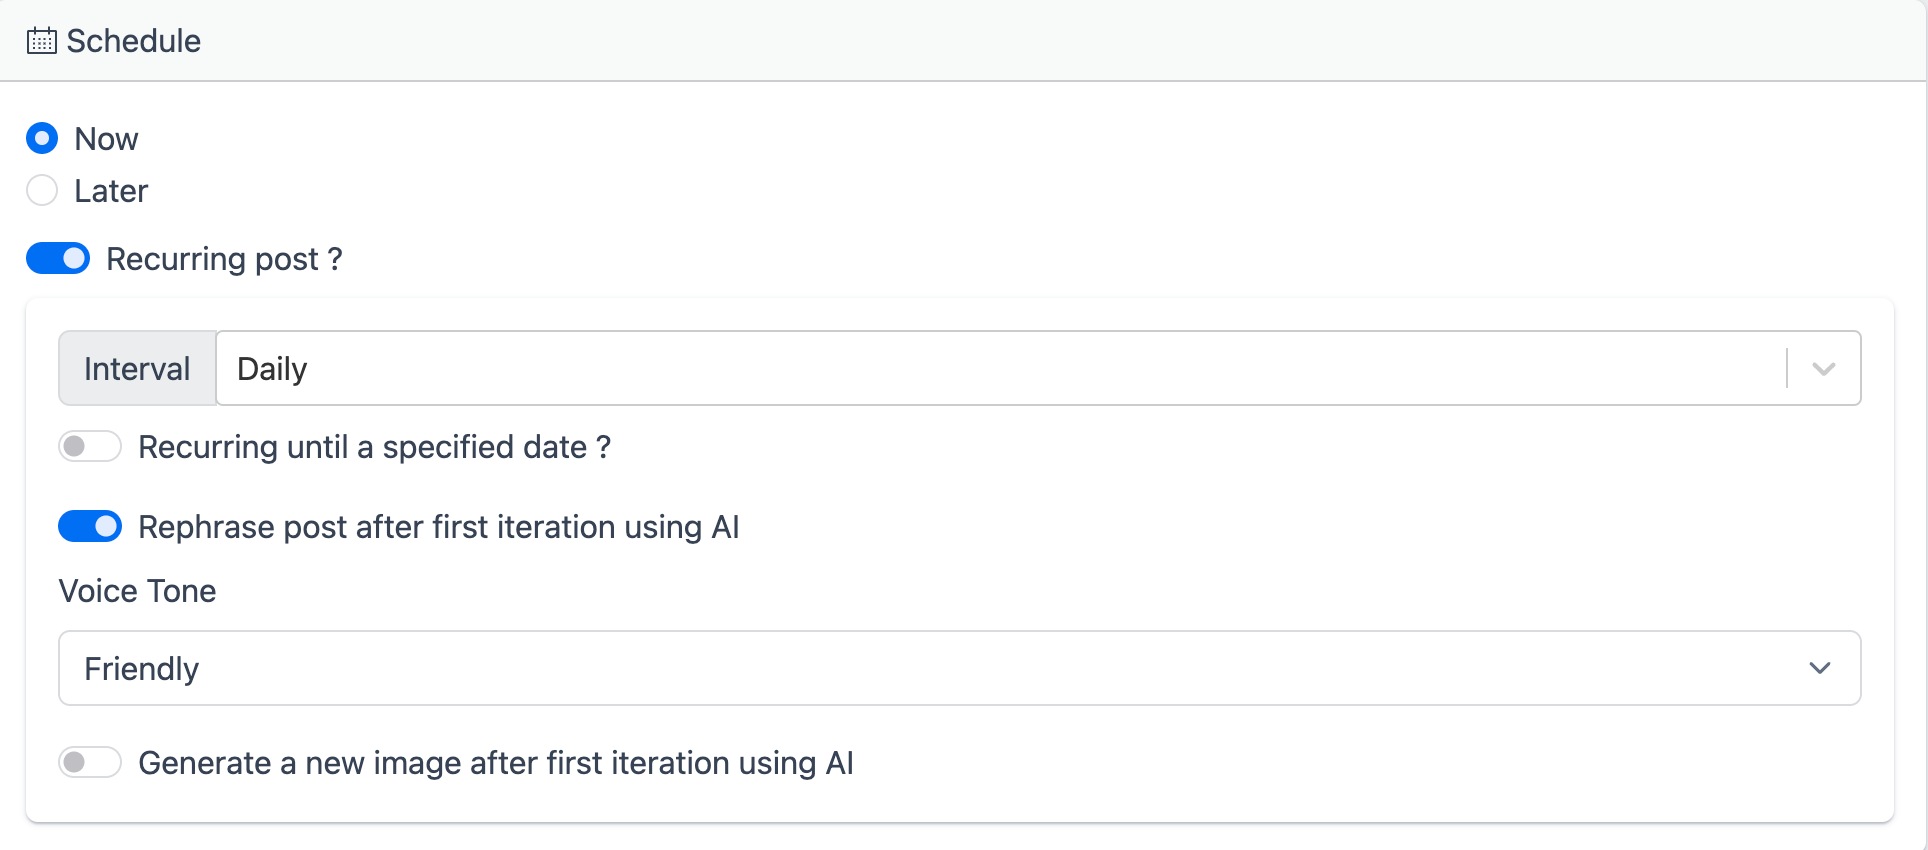
Rephrasing
If you want to avoid posting the same content but still wish to post repeatedly, turn on the Rephrase option. Robopost will use AI to modify the text based on the tone of voice you select.
Generate New Images
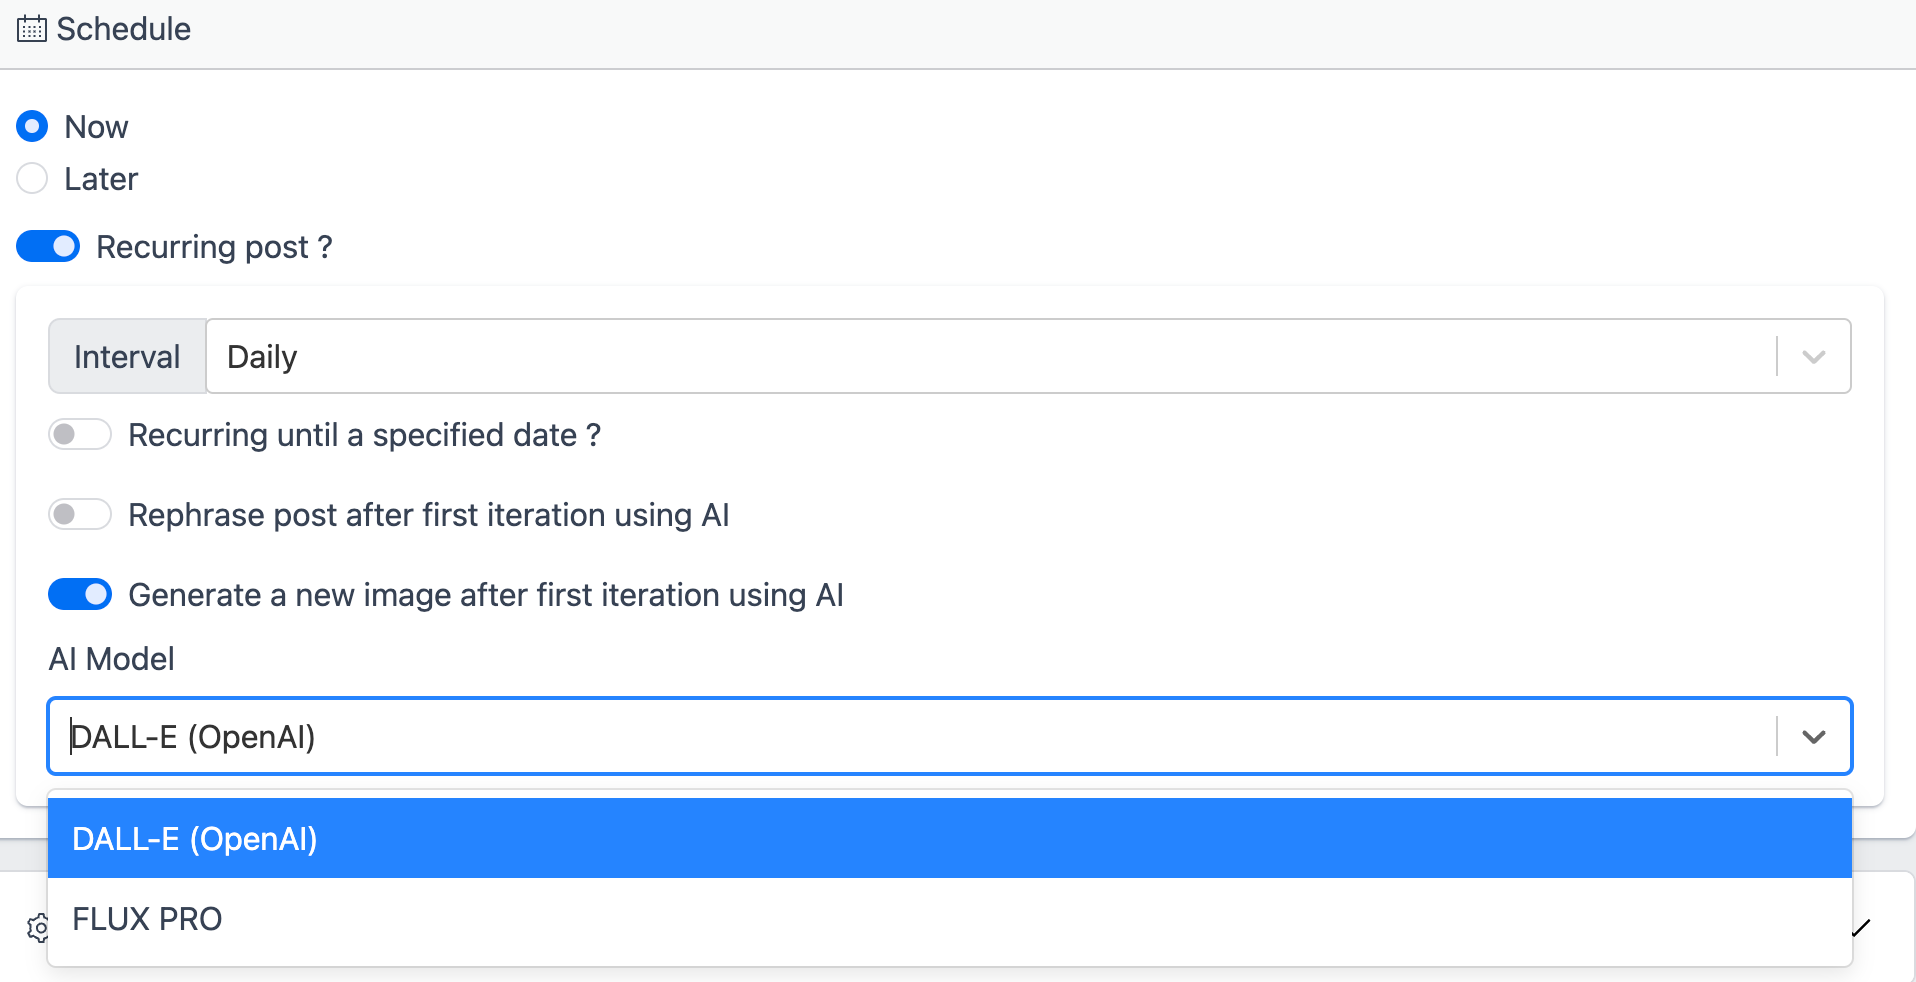
You can also generate a new image for each post. Simply turn on the Generate a new image option and select the AI model you would like to use. Please note that images will be generated starting from the second post onward.
UTM parameters
If your content has a URL, you can set UTM parameters from Advanced settings.
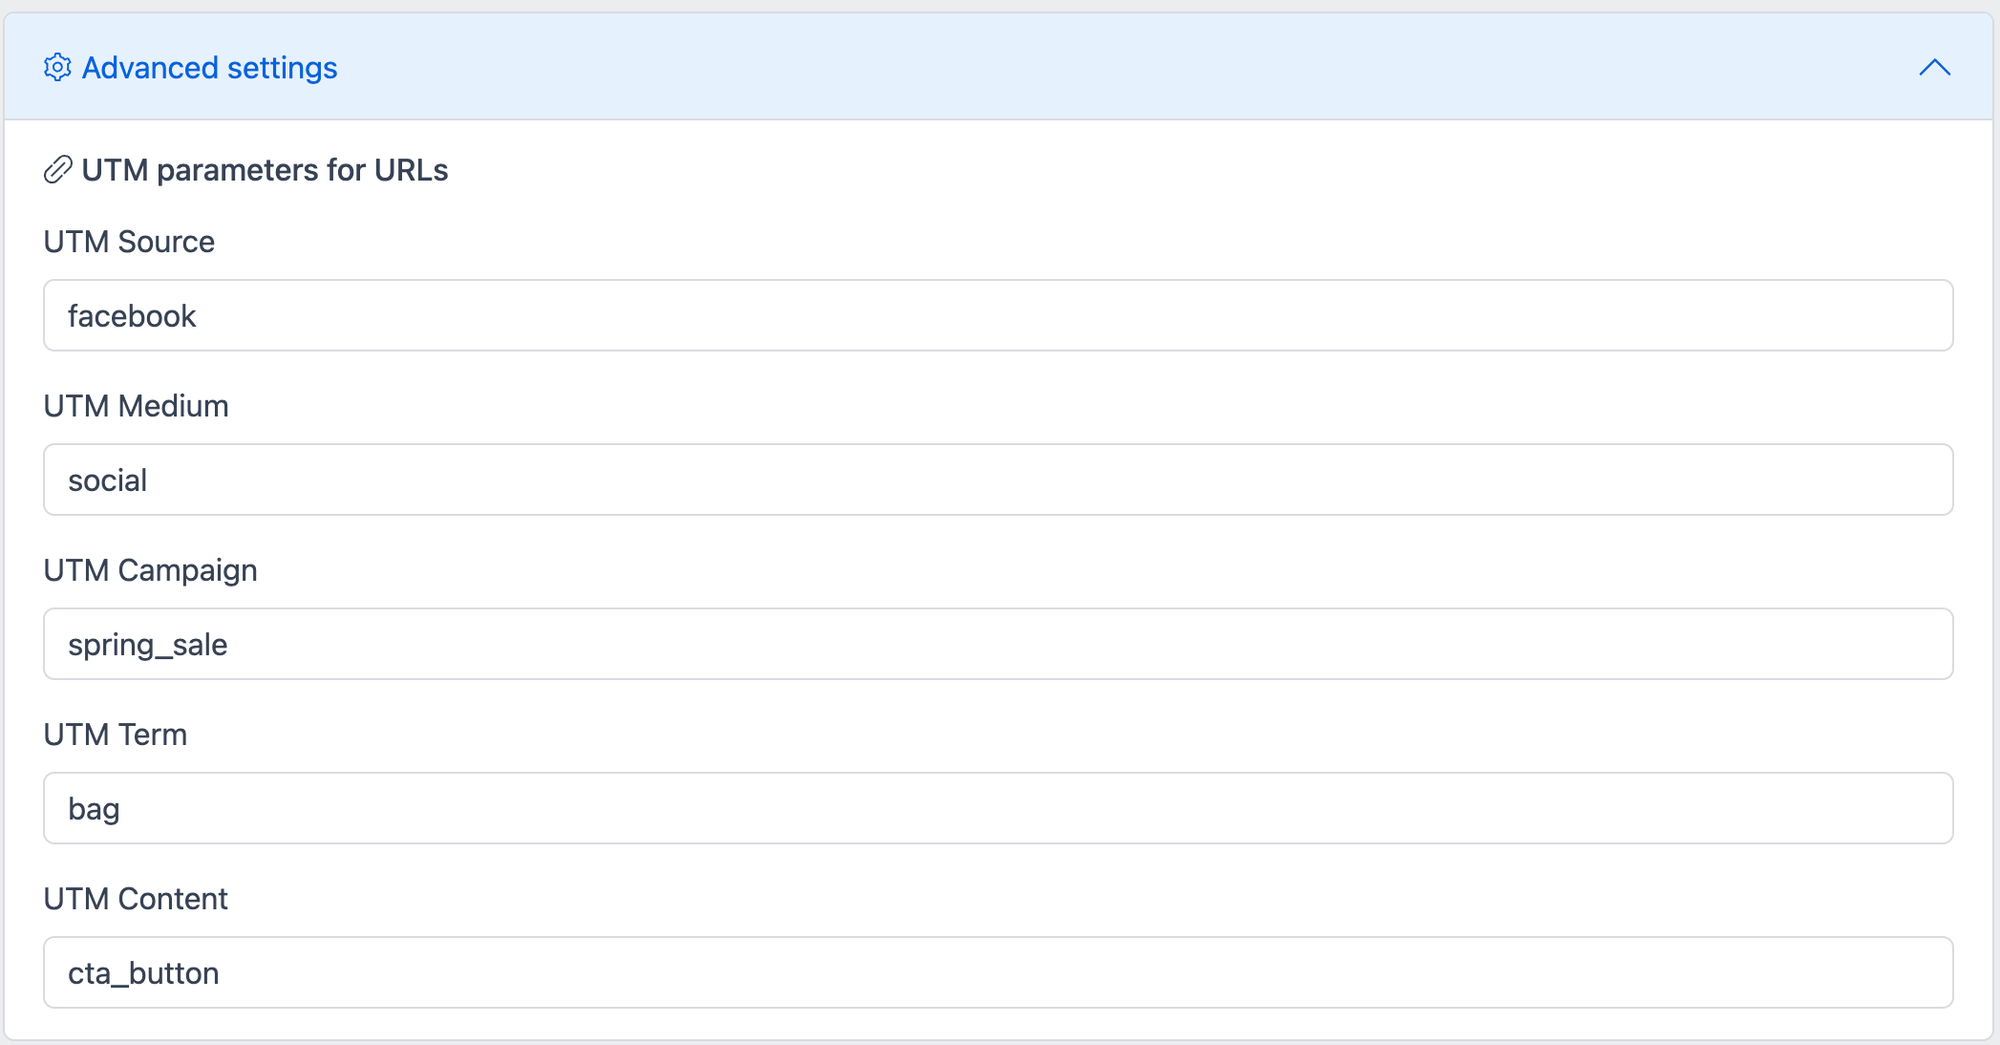
- UTM Source: Identifies the source of the traffic (e.g., Google, Facebook, Newsletter).
- UTM Medium: Describes the marketing medium (e.g., CPC, email, social).
- UTM Campaign: Names the specific campaign (e.g., SummerSale2024, LaunchPromo).
- UTM Term: Used to track specific keywords (common in paid search ads).
- UTM Content: Differentiates content within the same ad or link (e.g., banner1, CTA2).
Ensure that you enter a URL without any parameters in the Content section. Robopost will automatically add the UTM parameters to the end of the URL, starting with a ?.
e.g.,) https://example.com/landing-page?utm_source=facebook&utm_medium=social&utm_campaign=spring_sale&utm_term=bag&utm_content=cta_button


