Table of contents
Robopost offers a straightforward way to automatically add watermarks to your videos and images. Follow the steps below to enable and configure the watermarking feature.
1. Access Your Channel Settings
- From the Channels menu, select the channel you want to update.
- On the channel page, locate and click Show advanced settings.
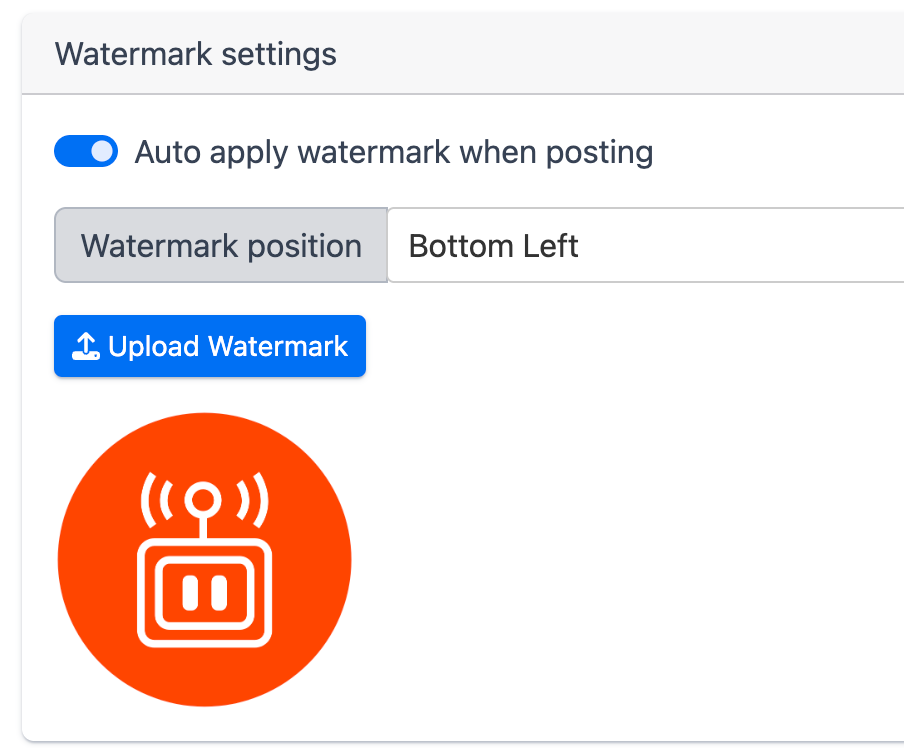
2. Configure Watermark Settings
- In the Watermark settings section:
- Check Auto apply watermark when posting.
- Choose the desired Watermark position from the available options (e.g., top-left, top-right, bottom-left, or bottom-right).
- Upload your Watermark image (ensure the file format and size are appropriate).
- Once you have made the changes, click Update Channel to save.
3. Posting Content with Watermarks
- After you enable and configure watermarking, any videos or images you post to this channel via Robopost will automatically have the watermark applied.
4. Team (Workspace) Level Watermark Settings
Robopost also allows you to offer watermarks at the Team (Workspace) level, ensuring consistent branding across all channels within a team.
- Go to Team from the main menu.
- Expand the Watermark settings within your team’s settings.
- You will find the same configuration options here (Auto apply watermark, position, image upload, etc.).
- For Agency members with White labeled teams, the process is the same.
Important: The priority of your watermark settings is Channel > Team. In other words, if you have a watermark configured at both the channel and team levels, the channel-level settings will override the team-level settings.
Tips for Best Results
- Use a high-resolution watermark image with a transparent background (PNG format works well).