Table of contents
As an AGENCY Plan owner on Robopost, you have the flexibility to seamlessly share exclusive content with your sub-teams (also referred to as “workspaces”). This guide walks you through creating a collection, sharing it with your chosen sub-teams, and adding posts that will automatically become available to them.
What Are Collections?
Collections are a way to group and organize posts that you want to share. Once you create and share a collection with sub-teams, all posts added to that collection are instantly accessible to those teams. This is an excellent way to:
- Maintain consistent messaging across multiple clients or departments.
- Save time by providing ready-to-use drafts to sub-teams.
- Keep content curated and organized in a central place.
Step 1: Create a New Collection
- Navigate to the Collections section in your Robopost dashboard.
- Typically, you can find this under the main menu labeled “Collections” or similar.
- Click on “Create New Collection.”
- Give your collection a descriptive name (e.g., “Spring Campaign Content”).
- Optionally, add a short description to help identify what the collection contains.
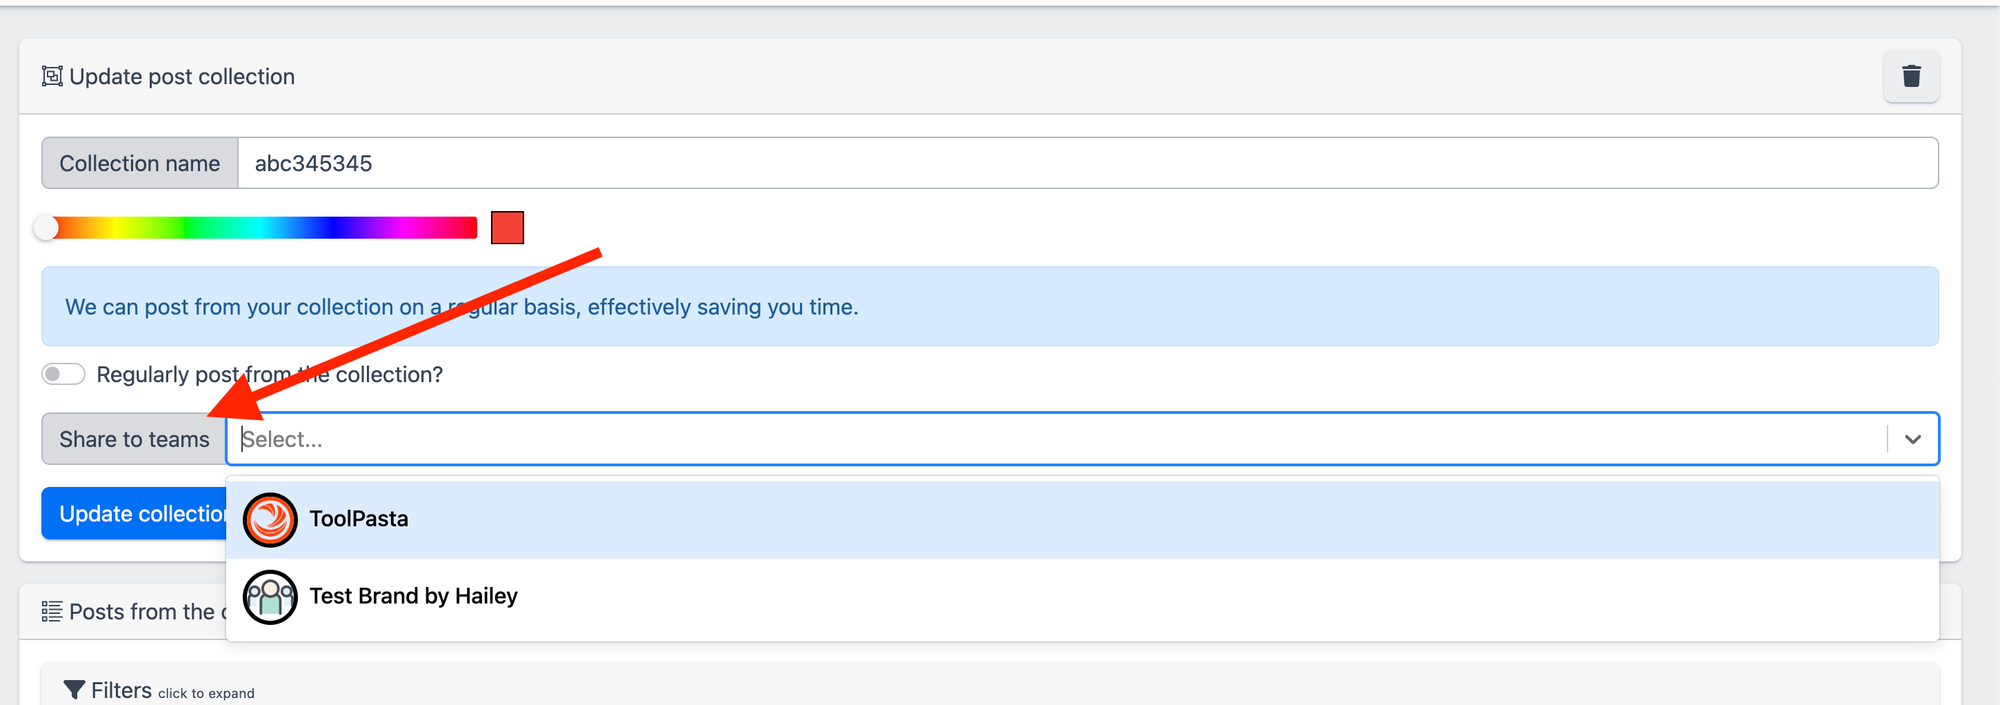
Step 2: Share with Sub-Teams
- Open the collection’s settings (or while creating a new collection, look for the sharing options).
- Look for “Share to teams” or a similar field that allows you to select specific sub-teams.
- Choose the sub-teams you want to share with.
- You may select multiple teams if you want them all to access the same content.
- Save your settings.
- Once saved, any post you add to this collection will automatically become visible to the selected sub-teams.
Tip: Only sub-teams you explicitly select can access the collection’s content.
Step 3: Add a Post to Your Collection
With your collection ready and shared, you can start adding posts.
- Go to “New Post” > “Simple Post.”
- Compose your post, including text, images, links, or other media.
- Use “More actions” > “Add to collection.”
- A prompt will appear allowing you to select which collection to place the post in.
- Select the collection you just created or an existing shared collection.
- Then finalize and submit your post.
Automatic Sharing
Once you add a post to the shared collection, it becomes immediately visible to all sub-teams you specified. This eliminates the need to manually send content to each team, saving you time and ensuring consistency.
Step 4: Sub-Teams Viewing and Using Shared Content
From the perspective of your sub-teams:
- Go to “Post Collections” > “Shared with my teams.”
- They will see all collections you have shared with them.
- Select the relevant collection to view all posts.
- Click “Copy to draft and edit.”
- This action creates a local draft in their own workspace, which they can then edit, schedule, or publish as needed.
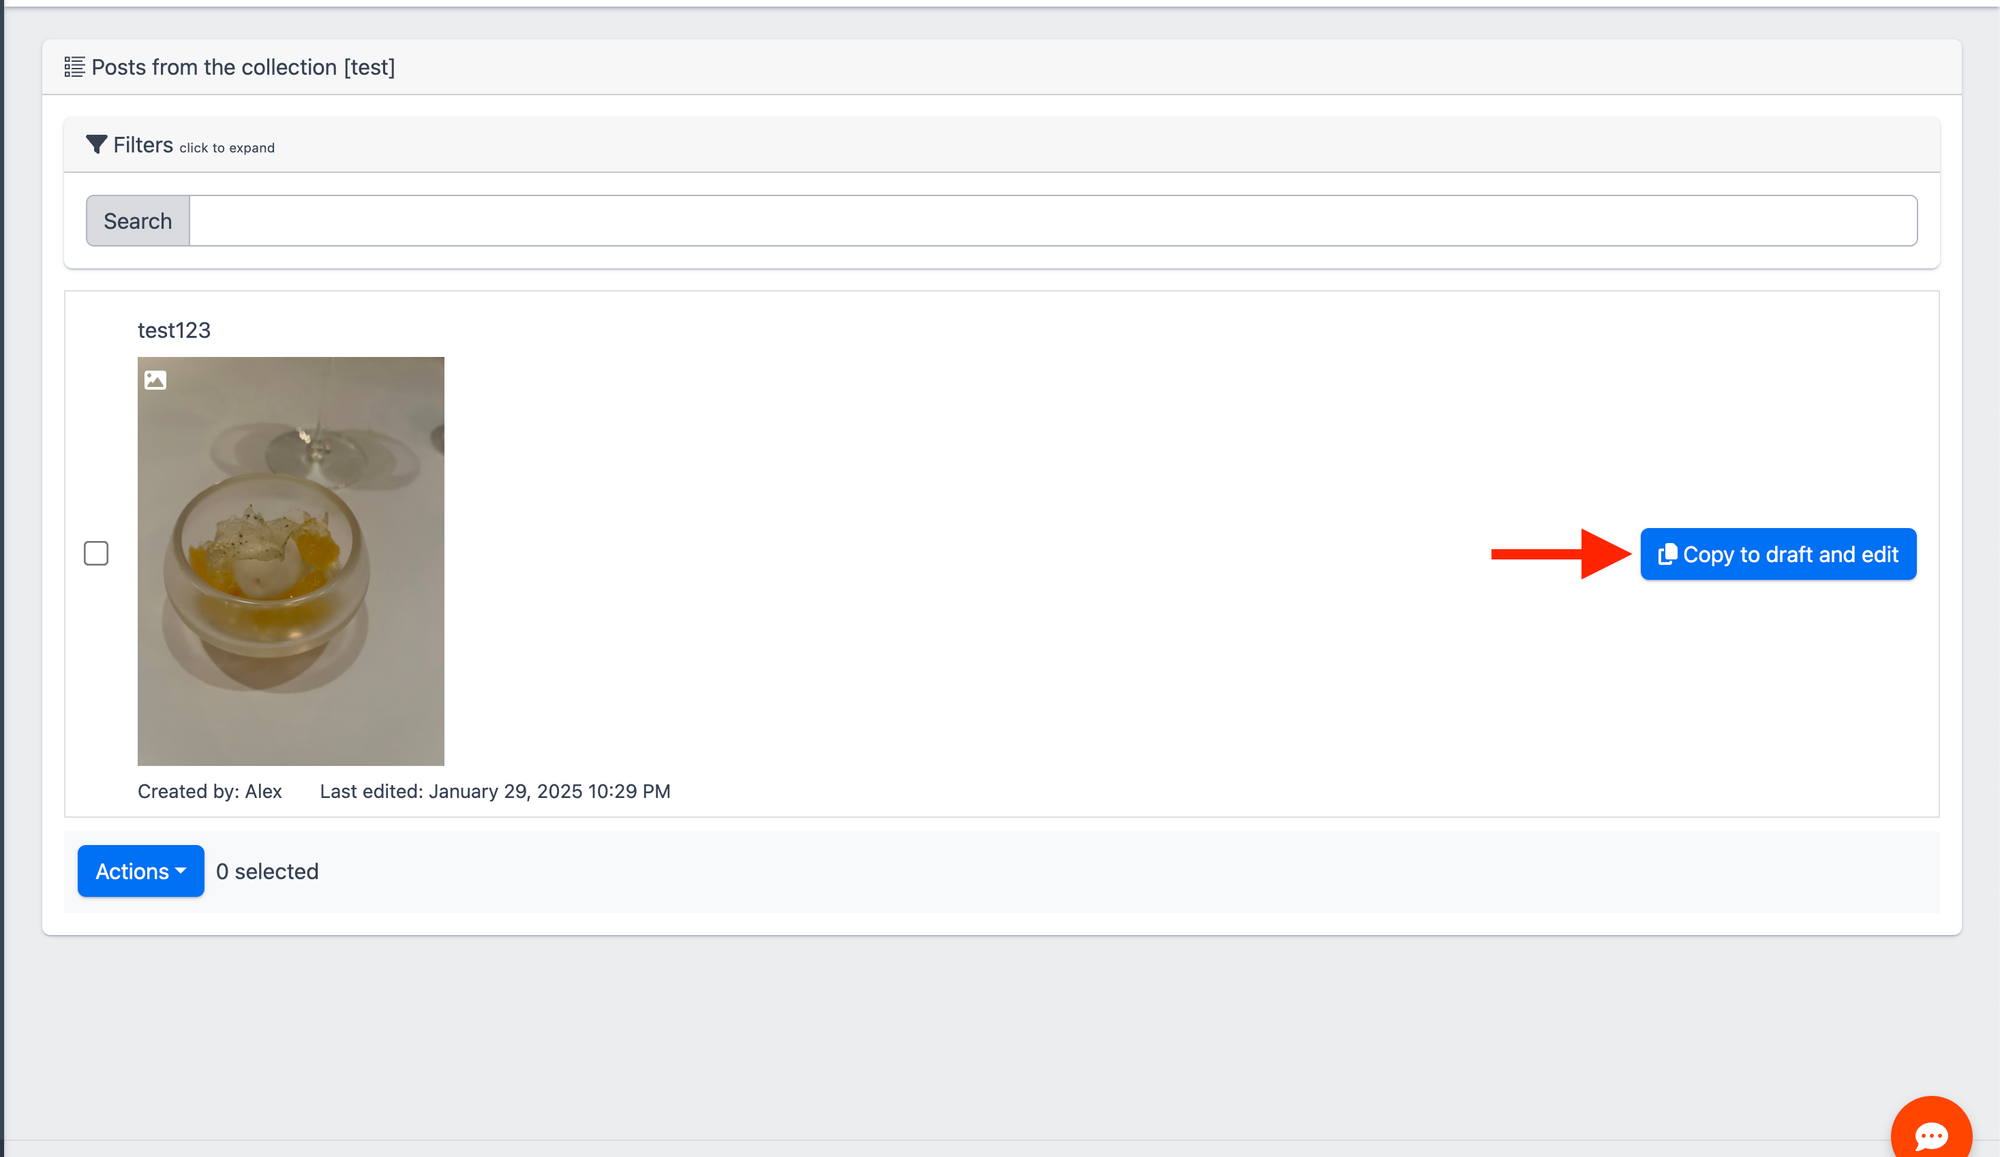
This straightforward mechanism allows sub-teams to adapt the shared content to their particular audience or campaign.
Best Practices
- Name Collections Clearly
Use clear, consistent naming to make it easier for sub-teams to identify and use the content. - Regular Updates
Update your collections frequently with fresh posts. Sub-teams will automatically get these new items. - Set Guidelines
Provide best practices or posting guidelines within your organization to ensure brand consistency.